A Place for Everything and Everything in its Place!
Recently I have been lured back to my first love of fishkeeping..... Killifish.
I have been around this niche side of the hobby for nigh on 38 year. I'm a member of the BKA and other International bodies around the globe.
Once the proud owner of a 100 tank killifish dedicated fish-house which I was forced to relinquish once my family grew and we needed to move house. For a few years the urge to start all over again had left me and I pursued other ventures for a short while. I'm now ready to rekindle my love affair for these little beauties albeit on a smaller scale.
I'm now in the process of building a small set-up in the garage and hope to breed many species and distribute them once more. So come along for the ride as I catalogue my re-emergence in words and pictures.
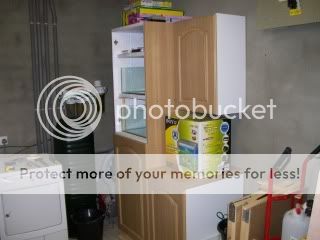
The plan is for everything to be neat and tidy so I have chosen to go with a Kitchen style set-up.
In the main it will consist of a 600mm Larder Unit a 500mm Hi-Line Base Unit and a 500mm wall cupboard.
B&Q (A DIY Warehouse) were having a kitchen sale so what better time to start.

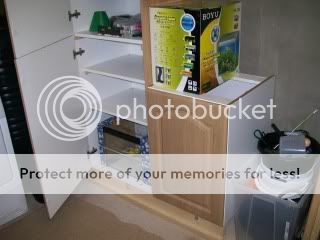
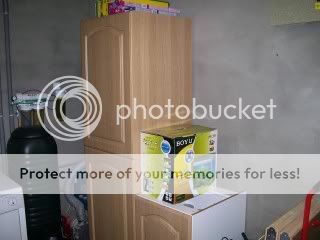
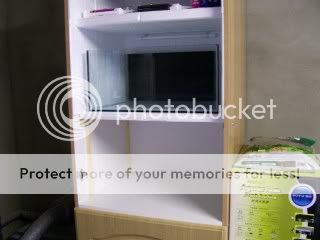
I first bought a Larder unit all for under £80 (excluding door handles)

The Larder, which now needs to have the shelf bearers strengthened

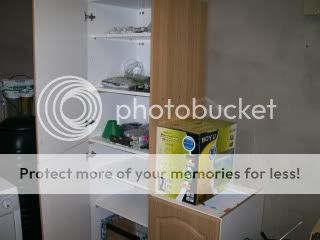
I have bolted wooden lathe through the larder carcass to give the shelves more strength

16mm holes have been drilled in the back and shelves to run electrical wire and airlines

These are present in each segment

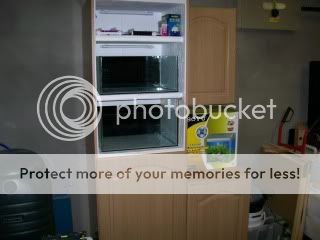
Around the back of the larder unit there is a nice recess area where I can run a pressurised Air Ring Main.
I can facilitate multiple tanks just by using a small air pump.

One of the "off bleeds" from the Ring Main to the tanks for small sponge filters

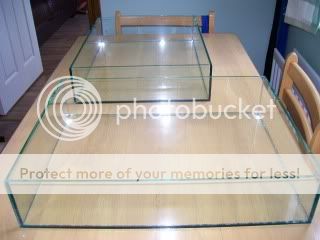
Making a start on the tanks

The back is placed in situ..Pre-sprayed Black

The ends are then offered up to the back panel
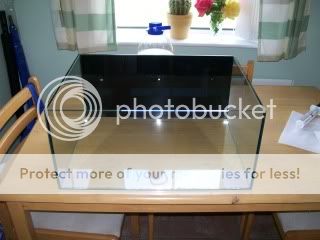
Finally the front is tacked into place
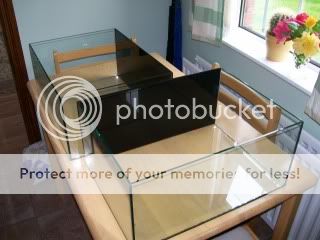
This cabinet will hold two of these tanks (18x15x9) amongst others. They will now be left for a good 24 hours before running silicone beads all around the seams to make the tanks watertight.
Work in Progress
Regards
BigC
Recently I have been lured back to my first love of fishkeeping..... Killifish.
I have been around this niche side of the hobby for nigh on 38 year. I'm a member of the BKA and other International bodies around the globe.
Once the proud owner of a 100 tank killifish dedicated fish-house which I was forced to relinquish once my family grew and we needed to move house. For a few years the urge to start all over again had left me and I pursued other ventures for a short while. I'm now ready to rekindle my love affair for these little beauties albeit on a smaller scale.
I'm now in the process of building a small set-up in the garage and hope to breed many species and distribute them once more. So come along for the ride as I catalogue my re-emergence in words and pictures.
The plan is for everything to be neat and tidy so I have chosen to go with a Kitchen style set-up.
In the main it will consist of a 600mm Larder Unit a 500mm Hi-Line Base Unit and a 500mm wall cupboard.
B&Q (A DIY Warehouse) were having a kitchen sale so what better time to start.
I first bought a Larder unit all for under £80 (excluding door handles)
The Larder, which now needs to have the shelf bearers strengthened
I have bolted wooden lathe through the larder carcass to give the shelves more strength
16mm holes have been drilled in the back and shelves to run electrical wire and airlines
These are present in each segment
Around the back of the larder unit there is a nice recess area where I can run a pressurised Air Ring Main.
I can facilitate multiple tanks just by using a small air pump.
One of the "off bleeds" from the Ring Main to the tanks for small sponge filters
Making a start on the tanks
The back is placed in situ..Pre-sprayed Black
The ends are then offered up to the back panel
Finally the front is tacked into place
This cabinet will hold two of these tanks (18x15x9) amongst others. They will now be left for a good 24 hours before running silicone beads all around the seams to make the tanks watertight.
Work in Progress
Regards
BigC

 )
) It is odd how you are drawn to some species, even though you may detour away for some time. You know I'll be keeping an eye on this one!