
simonbrown403
Fish Herder
Sorry about the wait, i,ve held up with work commitments, one of the joys of being self employed 
It started out as a joke which back fired on me good and proper, i kept joking to the wife that i,m going to build a tank in the alcove for my discus, which turned out to be a good idea, to her for her Tanganyika's.
Ow well better luck next time, i have to say it will look good when the fish are in it")
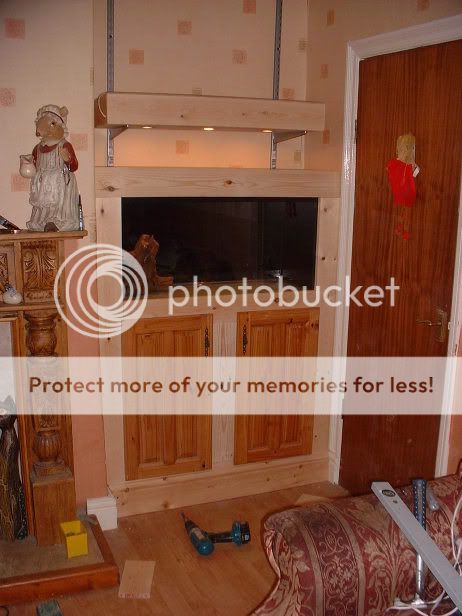
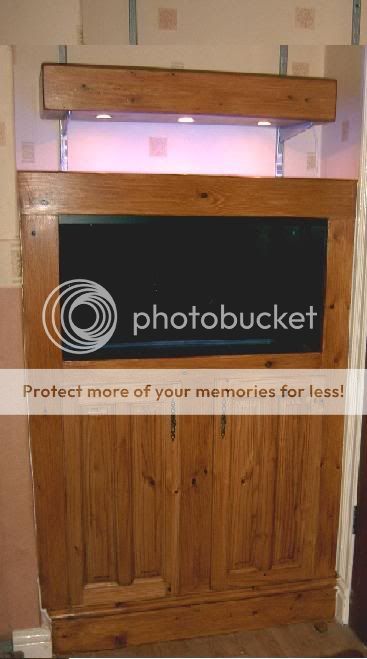
Alcove built in tank
to make this all you will need is a hammer, square, spirit level, tape measure, screwdriver, drill, saw, a jig saw would be handy, but you can get buy without it.
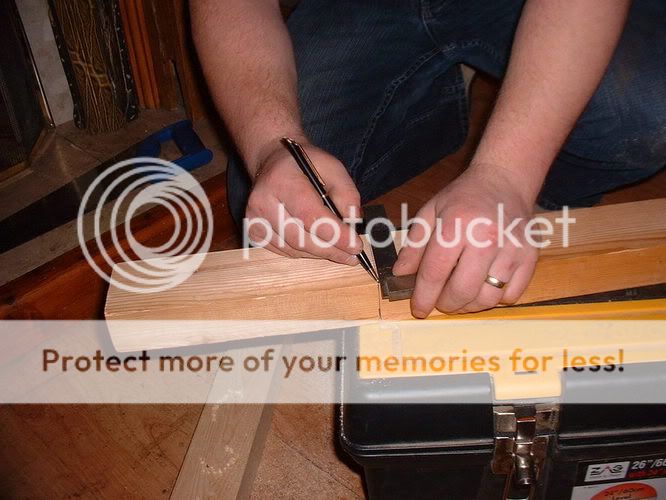
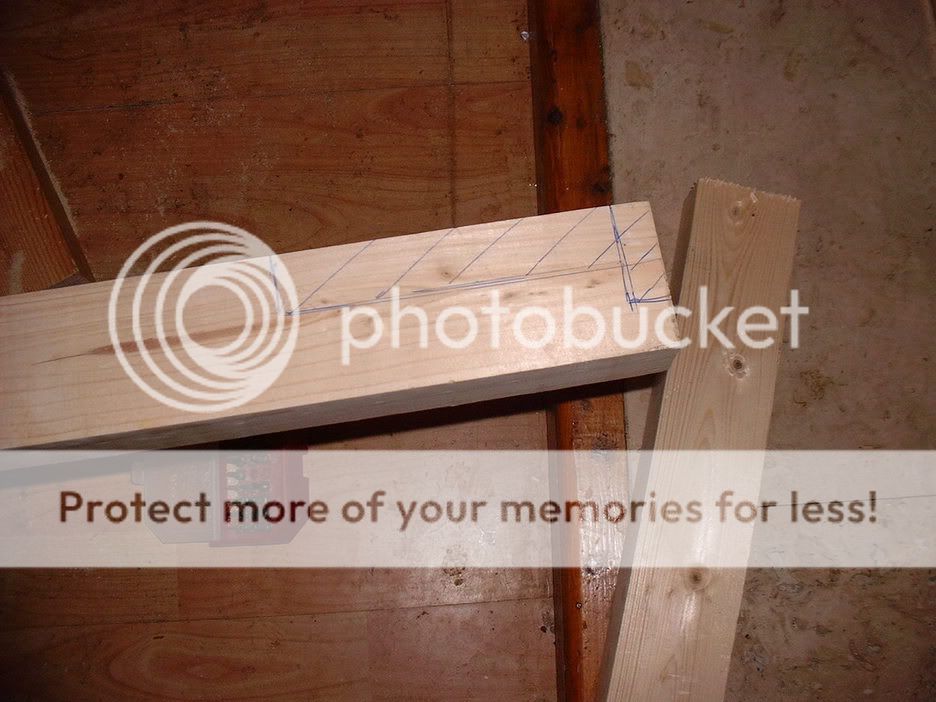
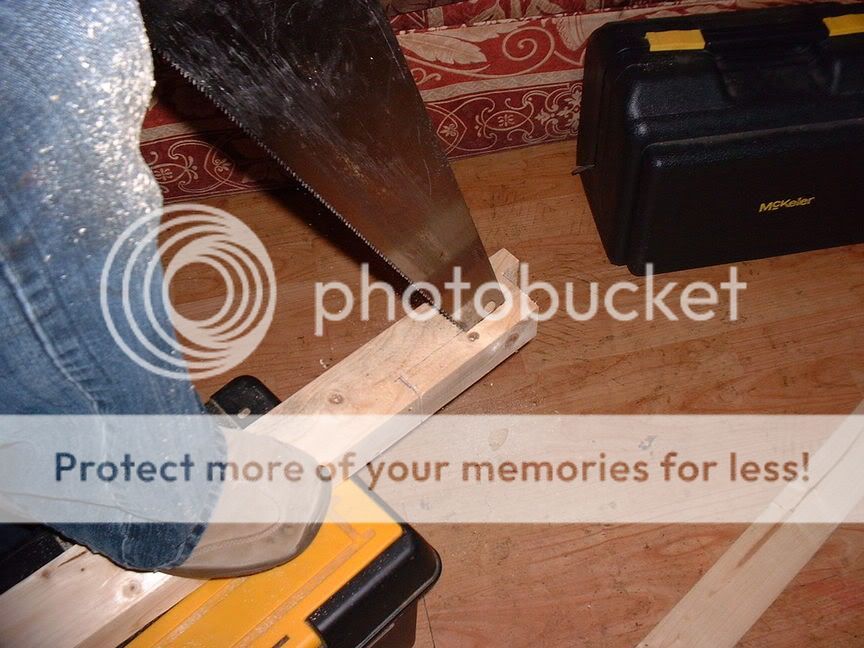
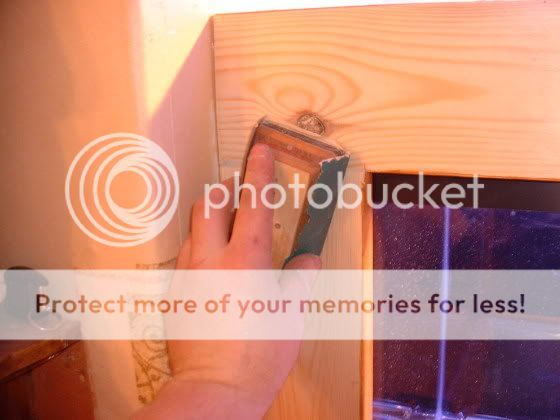
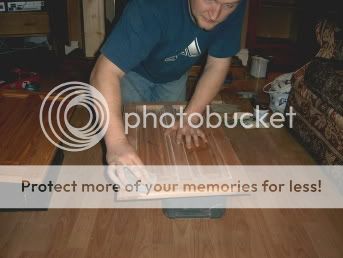
for all those that are diy virgins these next few pics will give you an idea on how to cut wood square
Note the first pic where i,m using a square to mark two edges to guide me, and the second where my finger is pointing in the direction i'm cutting, this is to stop you twisting the saw, and going a stray.

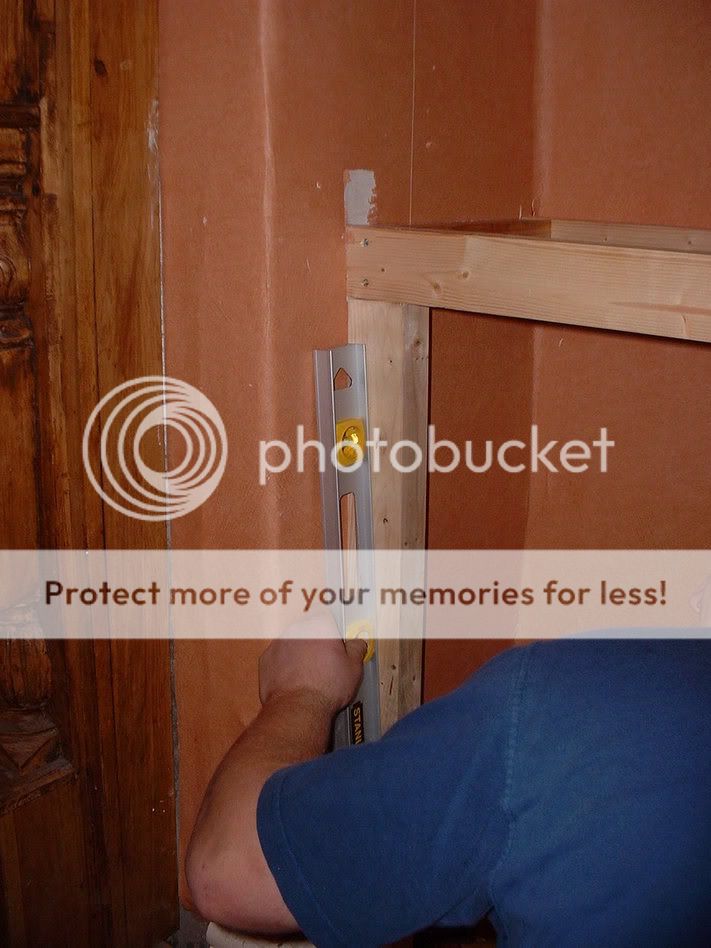
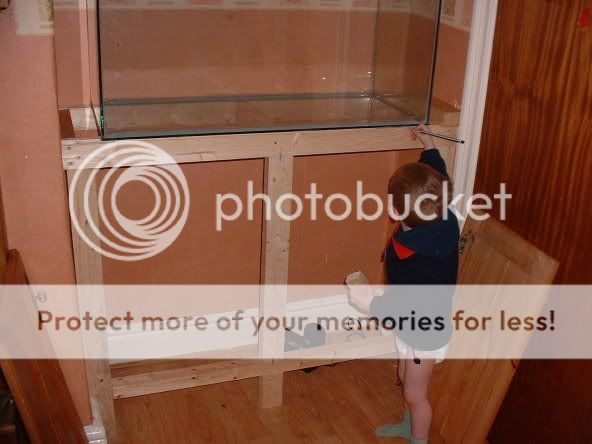
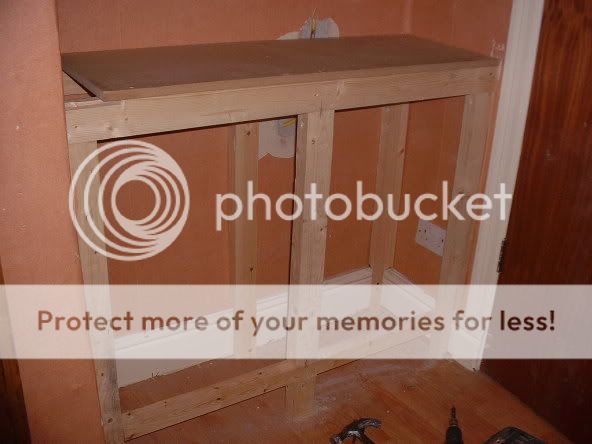
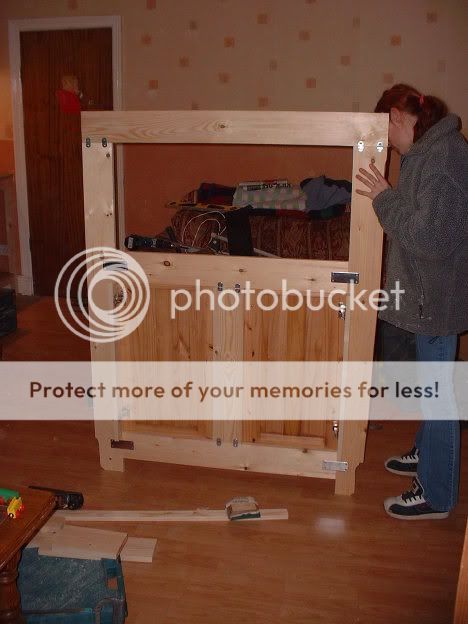
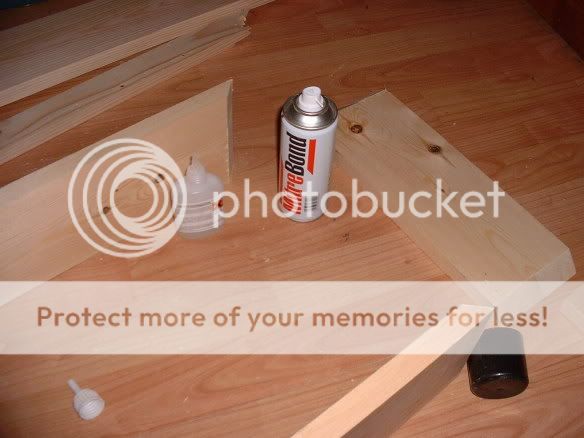
The next set of pics is the frame that supports the tank.
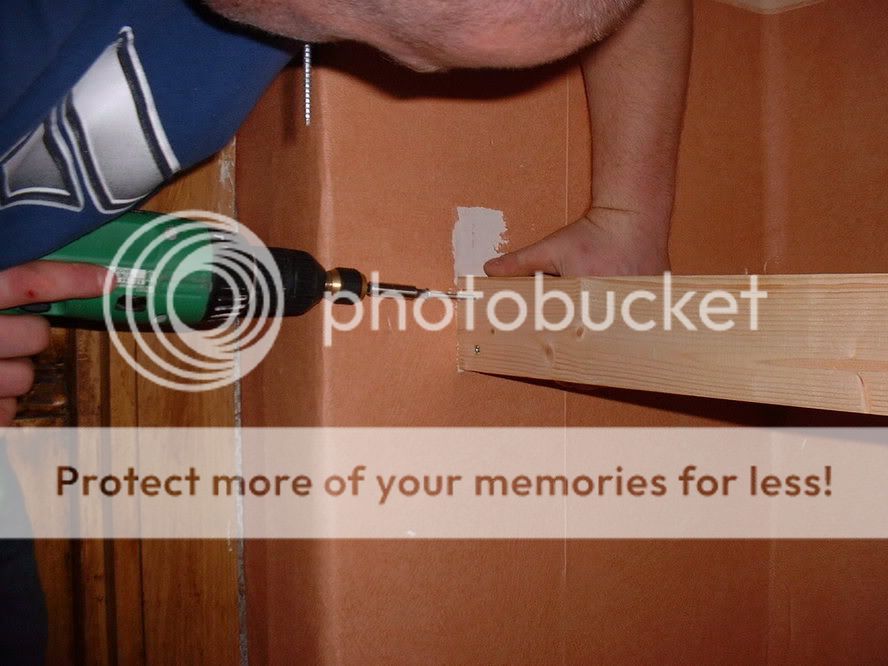
Measure in between the two walls and cut a piece of 3"*2" softwood to fit, make it tight, as it will make you life a little easier when you are lining things up.
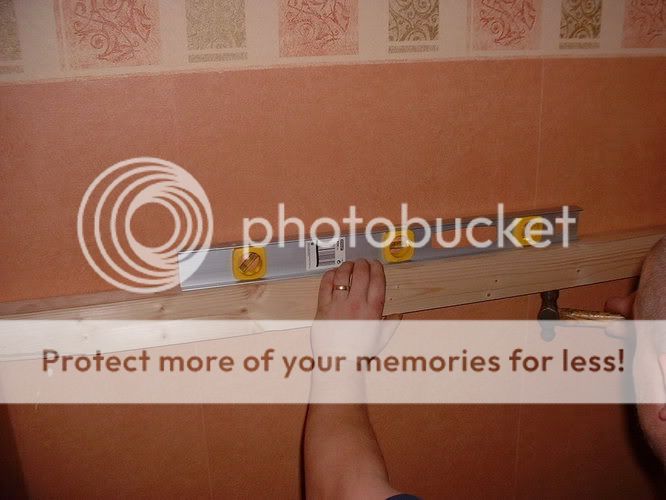
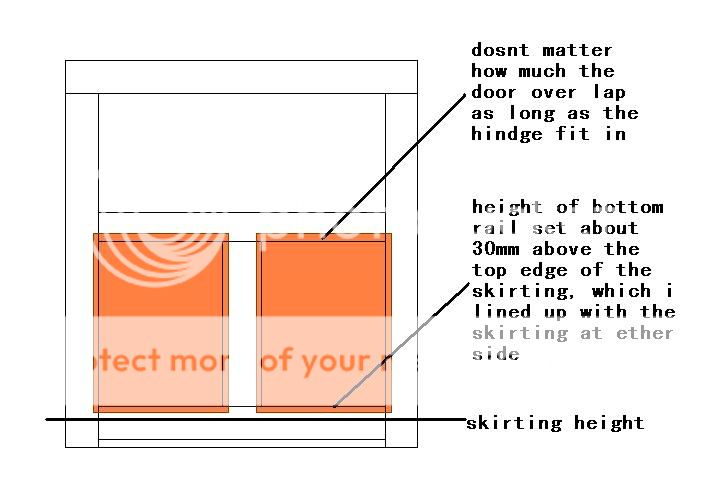
Mark the height you want you tank to be on the wall and bang the timber into place and level up with a spirit level. ( the height of my cupboard was determined by the height my doors, i,ve used two old pine kitchen, which are a standard height of 720mm, also i have 7" toro skirting board, which at a min puts me at height of 900mm/ to be honest with you i dint plan anything, i just made up as i went along)
Measure the width of you tank, just as and eg say it's 300mm/ 12", just as a reference as funny as it sounds isn't 3"*2" softwood doesn't actually measure 3"*2" its more like 70*45mm, so your front and back rail is taking up 90mm of that measurement, so you would have to cut 3 pieces of at 220mm that's with 10mm for clearance just for a bit of play.
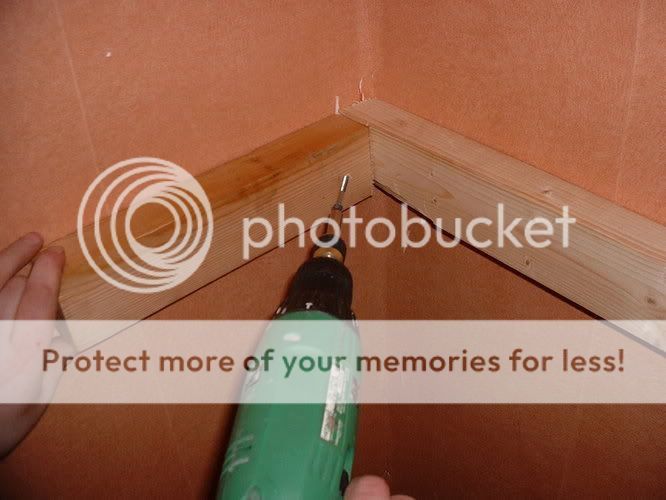
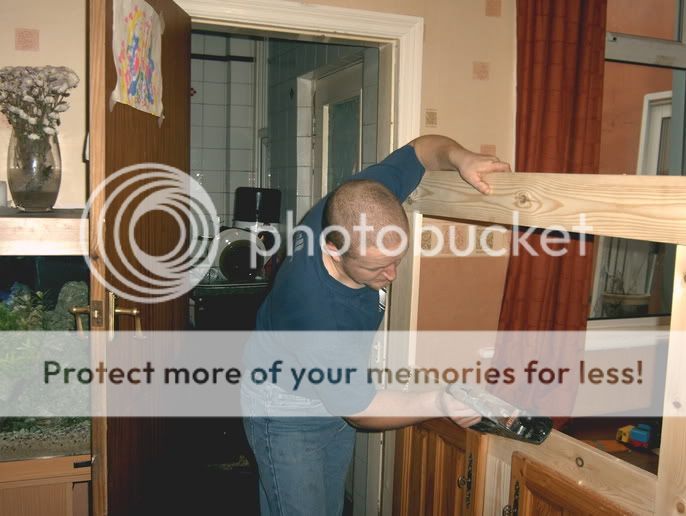
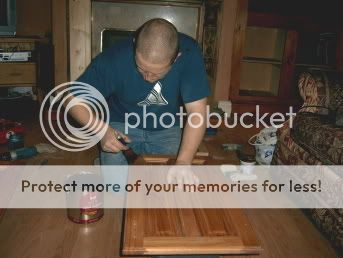
Take some 3" screws, an toe screw the the the three piece's to the back rail, one ether side and center.
(pic below) toe screwing is, putting the screws in at a angle, going through both piece's of wood, a small drill bit can be handy for this, to drill a pilot hole first)
Measure a piece of 3"*2"for the front rail, again make it tight, and knock it in place.
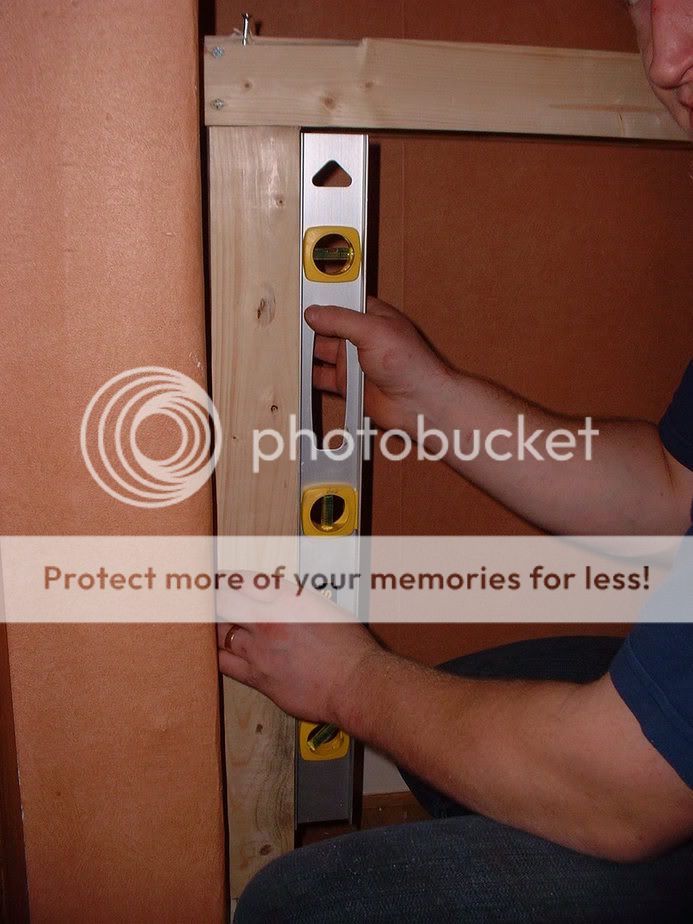
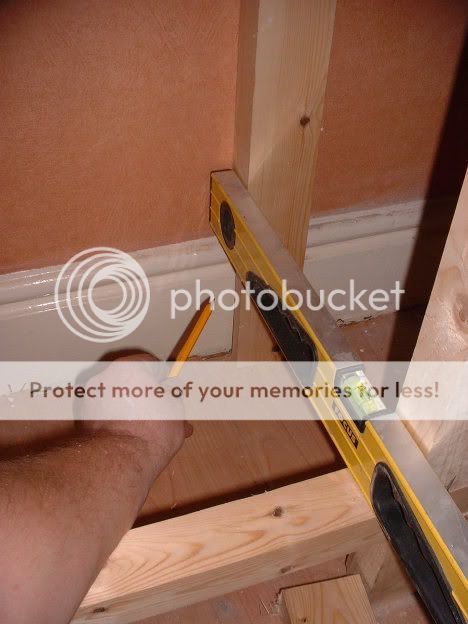
You will now need your spirit level, to level from front to back and side to side, again just tap it with you hammer until its level at ether ends and then from side to side, if you piece is tight it should be easy.

Once its all level, screw through the front rail and secure the three rails in place with 3" screws.
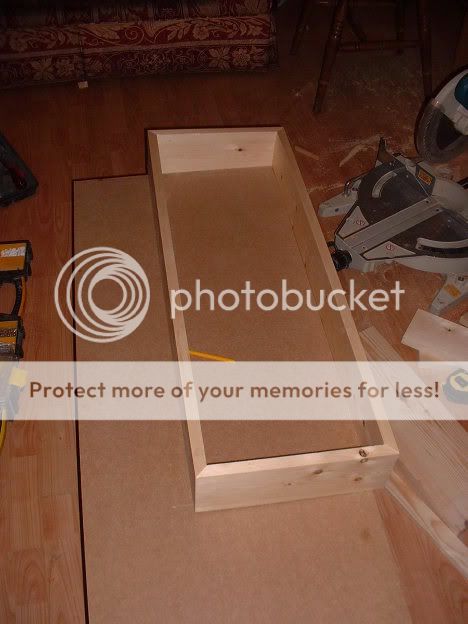
You now have a thick chunky shelf.
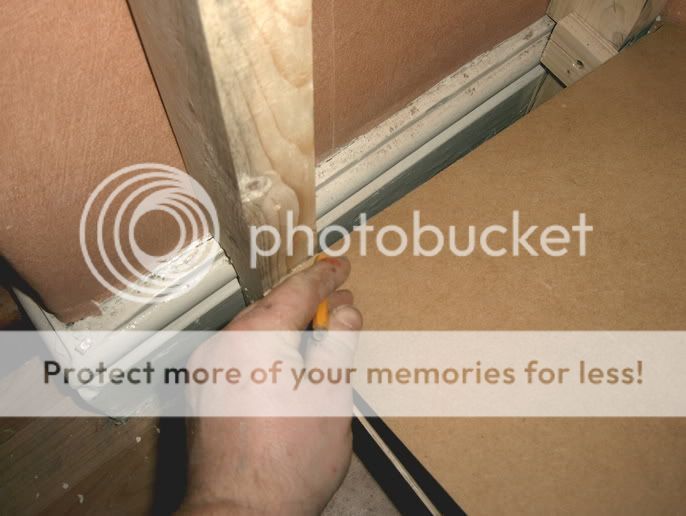
Now is the time to secure it to the wall with the 3" screws and raw plugs.
What i do is drill through the wood into the wall with a long series masonry bit which are ten a penny from your local diy store, and tap a raw plug in to the hole in the wood, then put the screw into the plug and tap it home until the tip of the screw is nearly flush with the timber, then just screw it up tight until it pulls under the timbers surface.
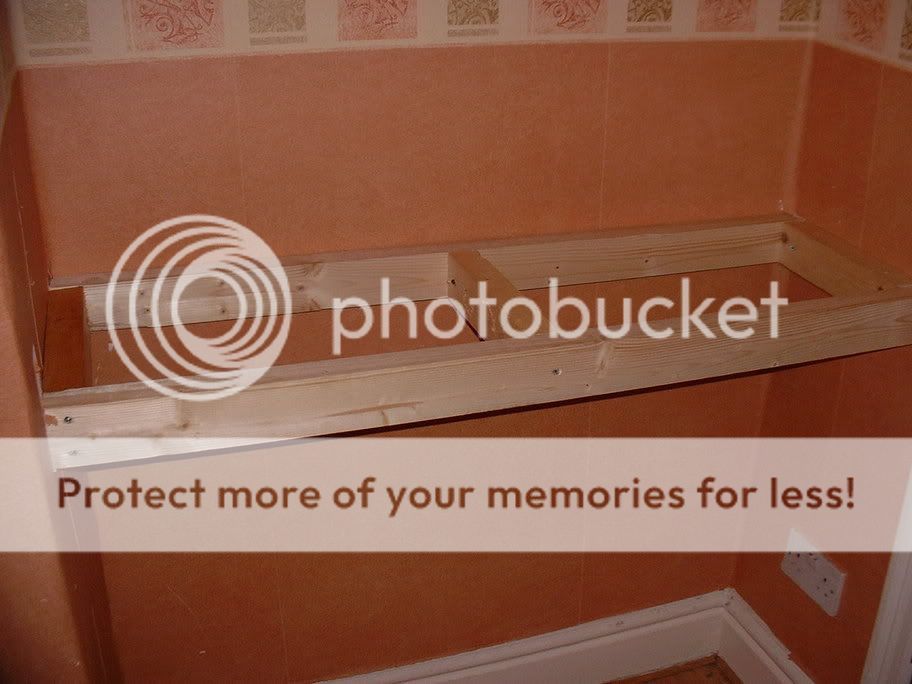
I know it all looks a little rough at the moment but as you progress it will cover it's self with each step.
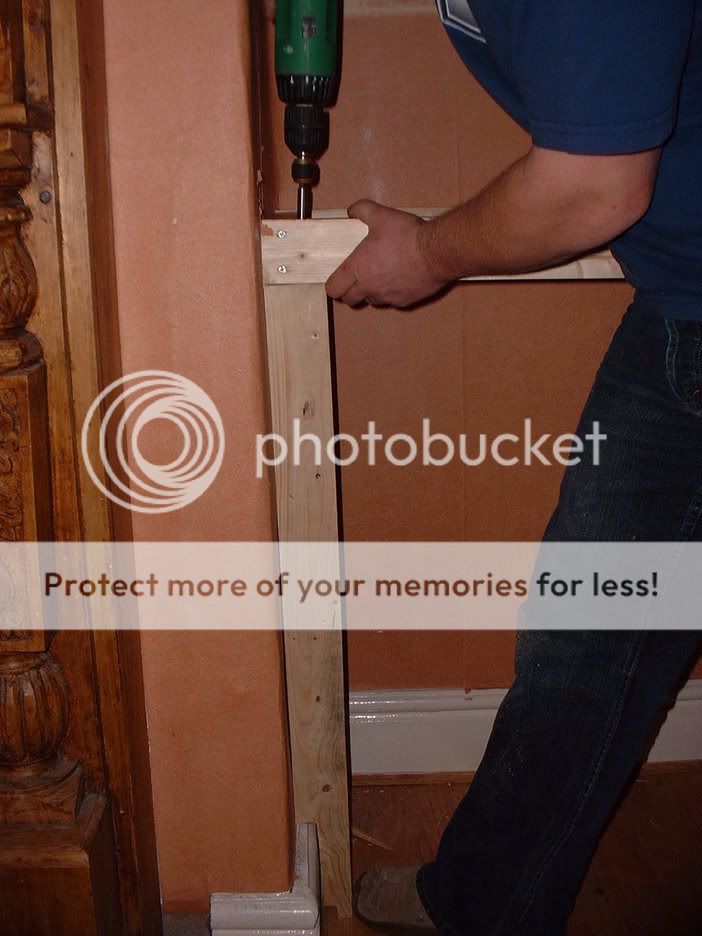
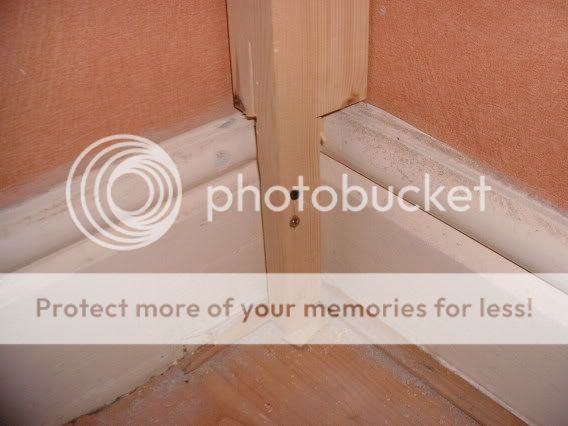
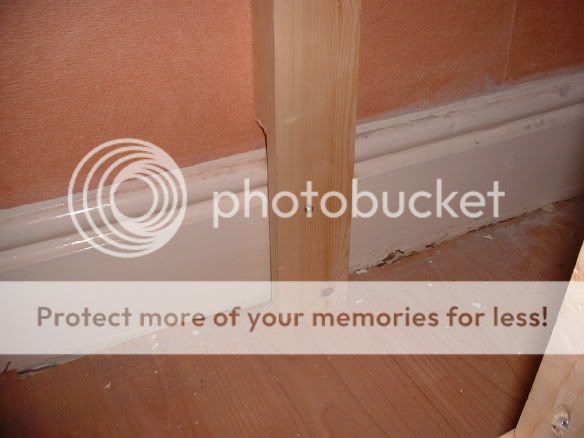
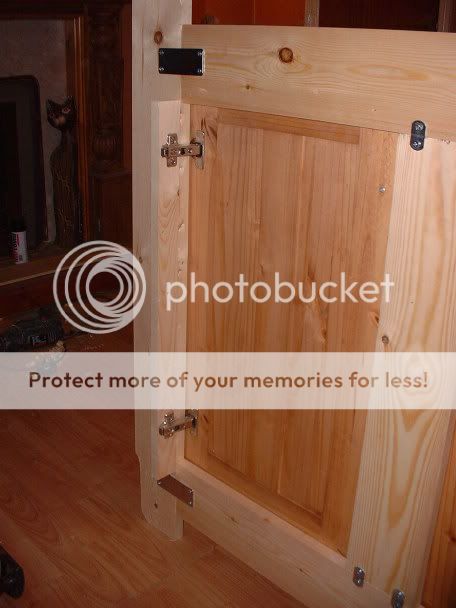
Pic's below is of an upright these will help support the weight of the tank ( if it's a small tank you can get away without them, i have had tanks of 60 to 100ltr on a frame just screwed to the wall).
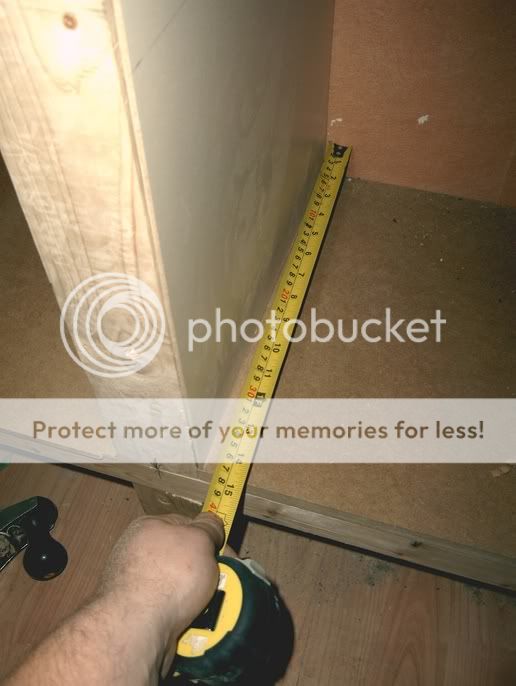
Firs measure from the floor to the underside of the frame and cut a piece of 3"*2" softwood to snugly fit (measure each upright individually as they may differ if the flood has a run on it)
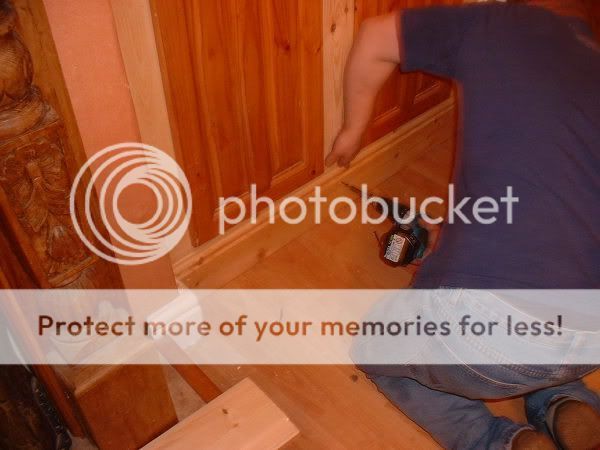
Next roughly mark on the wood where the skirting boards are and notching out to fit around.
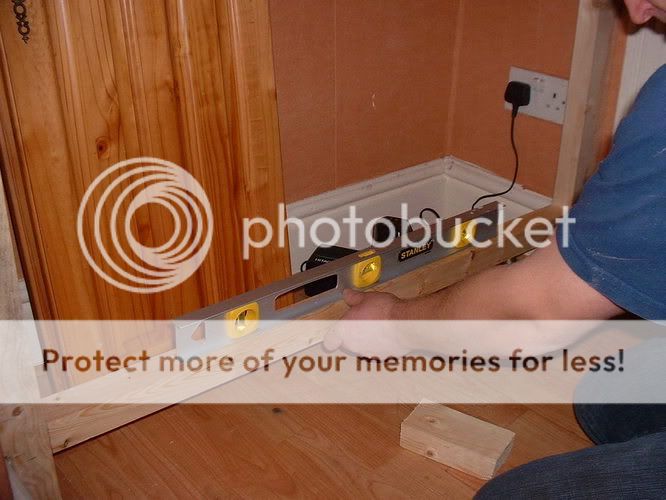
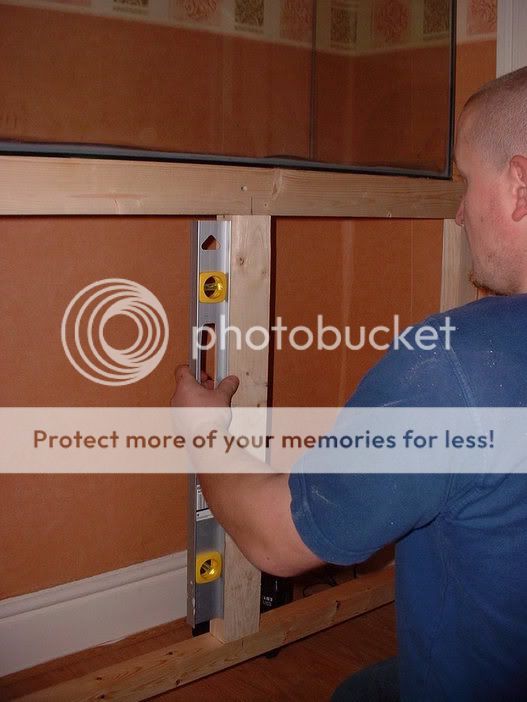
The next three pics are of the uprights being leveled.
First level it up from front to back, and put a small pencil mark on the skirting board as a reference, then do the same again but this time from side to side and put a pencil mark on the front rail of the frame.
The screw with a couple of 3" screw's, through the rail into the upright, and a 2" screw into the skirting board, making sure you line up you pencil marks.
Repeat this again for the other side.
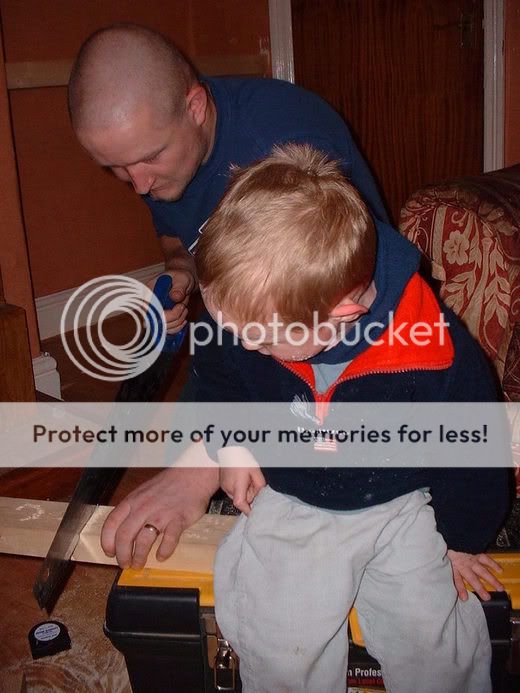
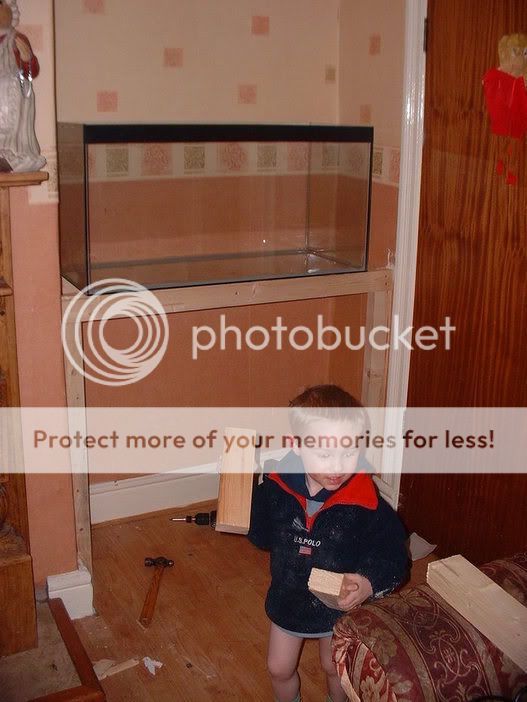
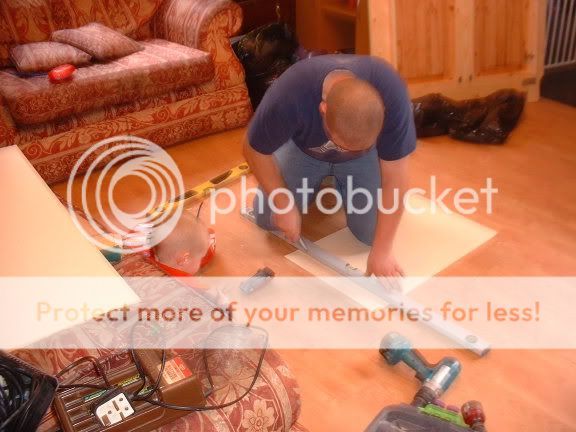
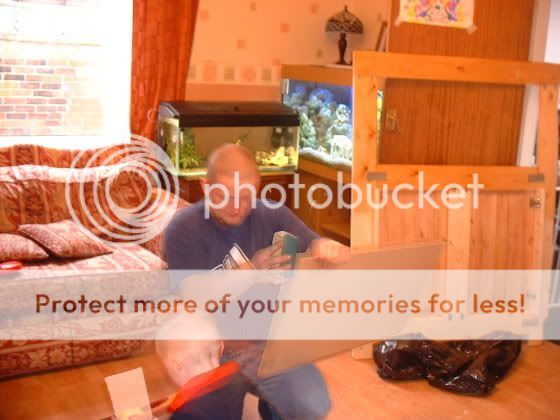
My assistant is my two year old son, who kept pinching my offcuts to build something at the other end of the room, he's a sweetie when he wants to be
Repeat the same process of notching out and leveling up as you did for the front uprights two uprights but this time put one in the middle.
Next is the bottom rail, same again measure and cut a piece of 2"*3" ( i used 2"*2" because i had it to hand) to fit between the two uprights, make it a snug fit.
The idea is to level the rail with your spirit level and line the center of the rail with the top of the skirting board so you have something to fix the skirting board to later.
Again i just toe screwed it at ether side,
Next mark center between the two uprights.
Cut a small noggin to fit under the bottom rail line it up with the center line and screw with a 3" screw.
Then cut a upright to fit between the top and bottom rail (make it snug), and line it up center using you two pencil marks, check it with your spirit level and screw the through the top rail and toe screw to the bottom rail with 3" screw's.
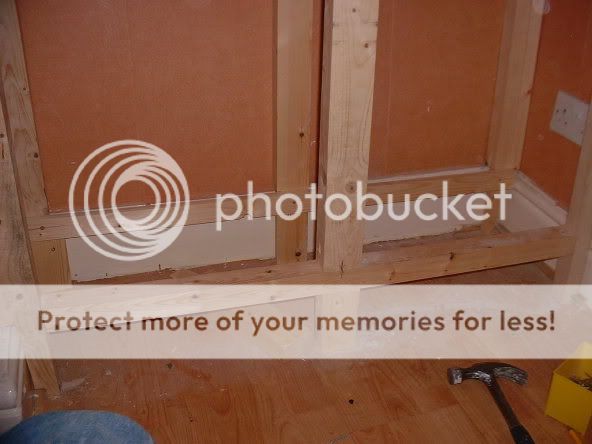
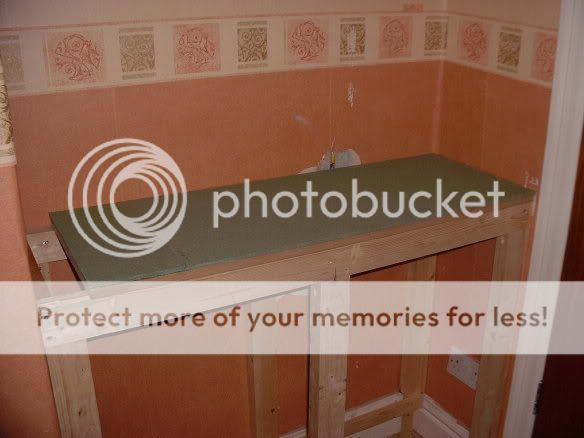
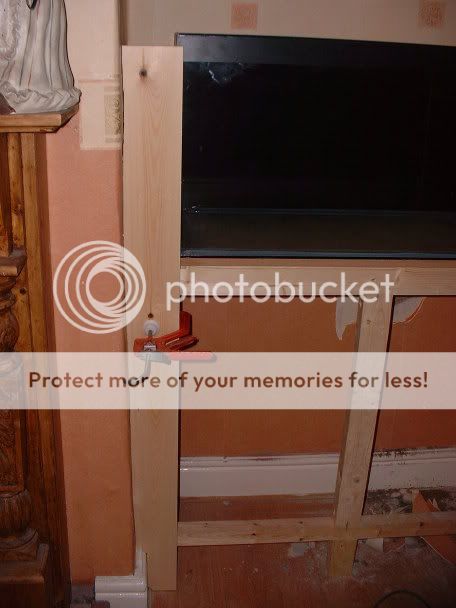
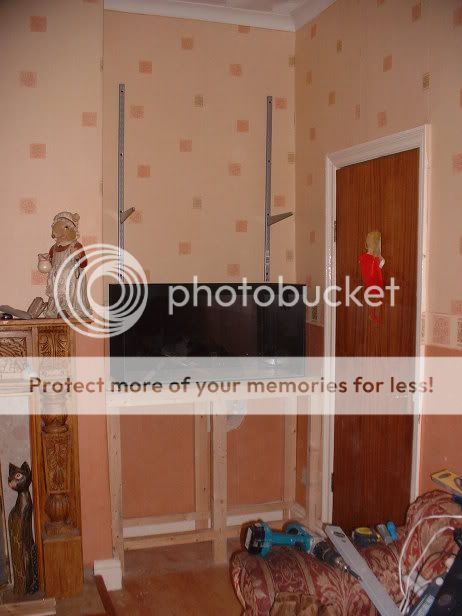
All i,m doing here is using the spirit level to put a pencil mark on the back uprights to line up a baton to sit the shelf on, which is simply a piece of 2"*1" softwood screwed to the uprights and lined up with the pencil marks.
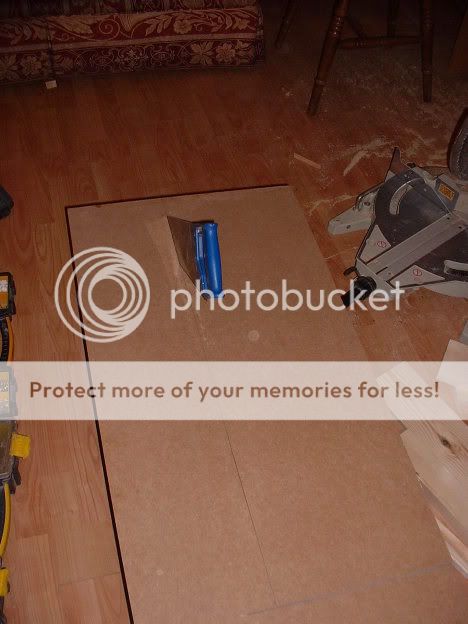
Measure in between the two walls again and also from front to back and transfer these measurements to a piece of board (12/18mm mdf/ply up to you, i used 18mm mdf because i had loads spare off a job) and cut out, like i said it doesn't have to be perfect as it will be covered later (the main point is it sits on the 3"*2" frame)
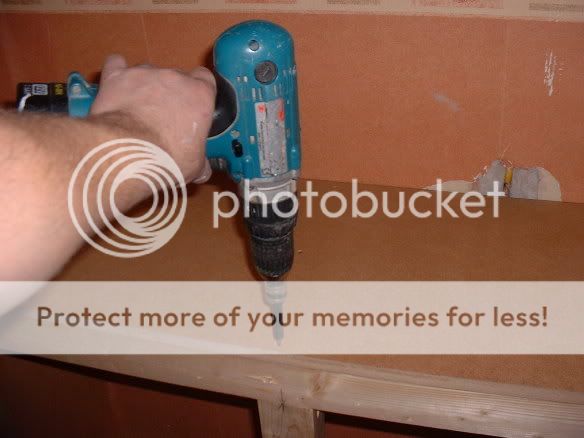
Once done drill and screw or nail to the frame with 40mm screw's or nails.


YOU will need to put some polystyrene or i used some fibreboard, the type you would use under laminate flooring, to pad the bottom and stop pressure cracks.
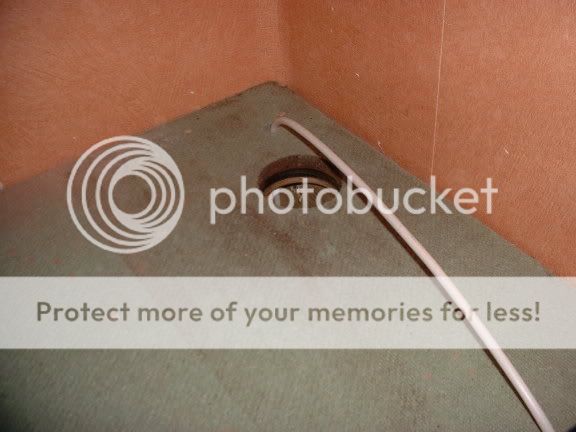
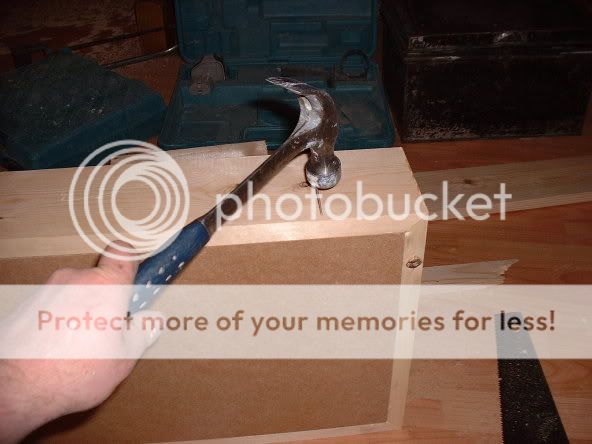
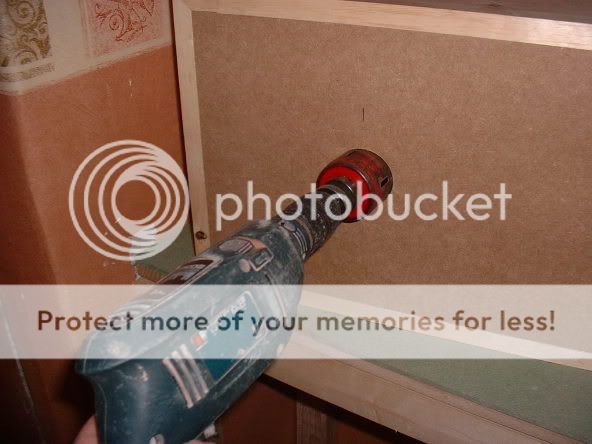
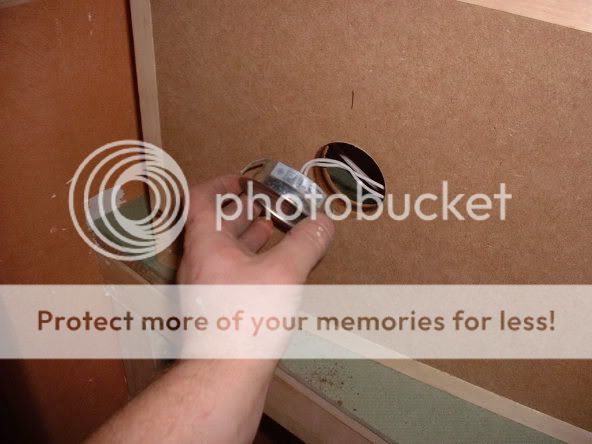
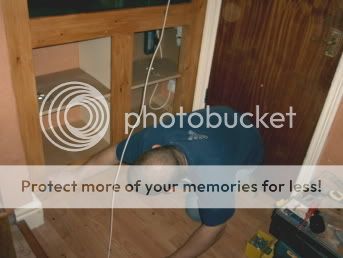
You will need to cut out a hole for your electrics to pass through, so i,ve cut a 55mm hole with a hole saw, a jigsaw or use a drill to drill out a series of holes and join them together would work just as well, as long as your able to pass your plugs and pipe work through there shouldn't be a problem
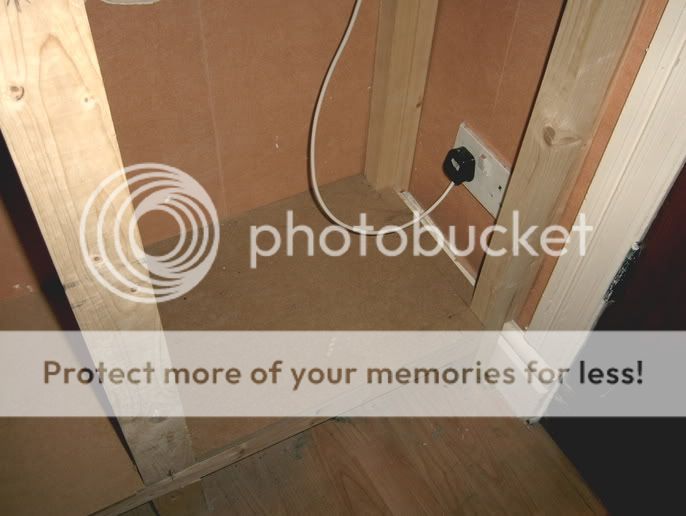
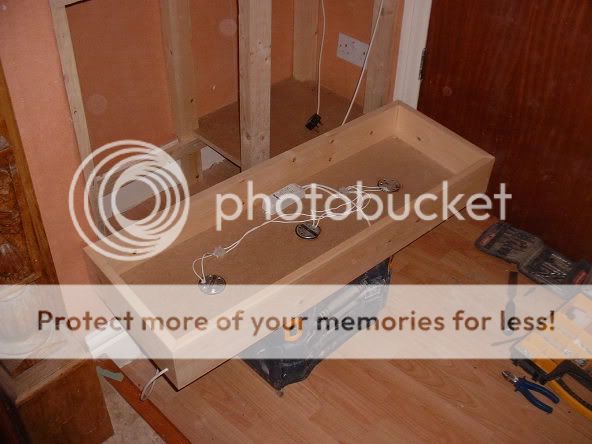
Next step is the bottom shelf, i,ve use 18mm mdf but any board would do from 6mm plus.
Simply measure from front to back at both sides and trancfer the mesurments to your board and cut, you will then need to noch around the uprights, screw or nail in place.
On the right hand side i have a socket so i have took the bottom shelf to the wall.
Thats it for now, il have to write part two later as it wont let me post any more pics.
It started out as a joke which back fired on me good and proper, i kept joking to the wife that i,m going to build a tank in the alcove for my discus, which turned out to be a good idea, to her for her Tanganyika's.
Ow well better luck next time, i have to say it will look good when the fish are in it
Alcove built in tank
to make this all you will need is a hammer, square, spirit level, tape measure, screwdriver, drill, saw, a jig saw would be handy, but you can get buy without it.
for all those that are diy virgins these next few pics will give you an idea on how to cut wood square
Note the first pic where i,m using a square to mark two edges to guide me, and the second where my finger is pointing in the direction i'm cutting, this is to stop you twisting the saw, and going a stray.
The next set of pics is the frame that supports the tank.
Measure in between the two walls and cut a piece of 3"*2" softwood to fit, make it tight, as it will make you life a little easier when you are lining things up.
Mark the height you want you tank to be on the wall and bang the timber into place and level up with a spirit level. ( the height of my cupboard was determined by the height my doors, i,ve used two old pine kitchen, which are a standard height of 720mm, also i have 7" toro skirting board, which at a min puts me at height of 900mm/ to be honest with you i dint plan anything, i just made up as i went along)
Measure the width of you tank, just as and eg say it's 300mm/ 12", just as a reference as funny as it sounds isn't 3"*2" softwood doesn't actually measure 3"*2" its more like 70*45mm, so your front and back rail is taking up 90mm of that measurement, so you would have to cut 3 pieces of at 220mm that's with 10mm for clearance just for a bit of play.
Take some 3" screws, an toe screw the the the three piece's to the back rail, one ether side and center.
(pic below) toe screwing is, putting the screws in at a angle, going through both piece's of wood, a small drill bit can be handy for this, to drill a pilot hole first)
Measure a piece of 3"*2"for the front rail, again make it tight, and knock it in place.
You will now need your spirit level, to level from front to back and side to side, again just tap it with you hammer until its level at ether ends and then from side to side, if you piece is tight it should be easy.
Once its all level, screw through the front rail and secure the three rails in place with 3" screws.
You now have a thick chunky shelf.
Now is the time to secure it to the wall with the 3" screws and raw plugs.
What i do is drill through the wood into the wall with a long series masonry bit which are ten a penny from your local diy store, and tap a raw plug in to the hole in the wood, then put the screw into the plug and tap it home until the tip of the screw is nearly flush with the timber, then just screw it up tight until it pulls under the timbers surface.
I know it all looks a little rough at the moment but as you progress it will cover it's self with each step.
Pic's below is of an upright these will help support the weight of the tank ( if it's a small tank you can get away without them, i have had tanks of 60 to 100ltr on a frame just screwed to the wall).
Firs measure from the floor to the underside of the frame and cut a piece of 3"*2" softwood to snugly fit (measure each upright individually as they may differ if the flood has a run on it)
Next roughly mark on the wood where the skirting boards are and notching out to fit around.
The next three pics are of the uprights being leveled.
First level it up from front to back, and put a small pencil mark on the skirting board as a reference, then do the same again but this time from side to side and put a pencil mark on the front rail of the frame.
The screw with a couple of 3" screw's, through the rail into the upright, and a 2" screw into the skirting board, making sure you line up you pencil marks.
Repeat this again for the other side.
My assistant is my two year old son, who kept pinching my offcuts to build something at the other end of the room, he's a sweetie when he wants to be
Repeat the same process of notching out and leveling up as you did for the front uprights two uprights but this time put one in the middle.
Next is the bottom rail, same again measure and cut a piece of 2"*3" ( i used 2"*2" because i had it to hand) to fit between the two uprights, make it a snug fit.
The idea is to level the rail with your spirit level and line the center of the rail with the top of the skirting board so you have something to fix the skirting board to later.
Again i just toe screwed it at ether side,
Next mark center between the two uprights.
Cut a small noggin to fit under the bottom rail line it up with the center line and screw with a 3" screw.
Then cut a upright to fit between the top and bottom rail (make it snug), and line it up center using you two pencil marks, check it with your spirit level and screw the through the top rail and toe screw to the bottom rail with 3" screw's.
All i,m doing here is using the spirit level to put a pencil mark on the back uprights to line up a baton to sit the shelf on, which is simply a piece of 2"*1" softwood screwed to the uprights and lined up with the pencil marks.
Measure in between the two walls again and also from front to back and transfer these measurements to a piece of board (12/18mm mdf/ply up to you, i used 18mm mdf because i had loads spare off a job) and cut out, like i said it doesn't have to be perfect as it will be covered later (the main point is it sits on the 3"*2" frame)
Once done drill and screw or nail to the frame with 40mm screw's or nails.
YOU will need to put some polystyrene or i used some fibreboard, the type you would use under laminate flooring, to pad the bottom and stop pressure cracks.
You will need to cut out a hole for your electrics to pass through, so i,ve cut a 55mm hole with a hole saw, a jigsaw or use a drill to drill out a series of holes and join them together would work just as well, as long as your able to pass your plugs and pipe work through there shouldn't be a problem
Next step is the bottom shelf, i,ve use 18mm mdf but any board would do from 6mm plus.
Simply measure from front to back at both sides and trancfer the mesurments to your board and cut, you will then need to noch around the uprights, screw or nail in place.
On the right hand side i have a socket so i have took the bottom shelf to the wall.
Thats it for now, il have to write part two later as it wont let me post any more pics.


 Glad you found a good use for that space. Have fun stocking the tank
 Can't wait for pics of the stocked tank, when the water clears up. Would be nice to see pics of the tank with normal lights and the moonlight ones. Not sure if you mentioned it before, but how big is the tank? Good job once again, it looks really professional!