Diy Whole Tank Led Lighting Retrofit

The April FOTM Contest Poll is open!
FishForums.net Fish of the Month
🏆 Click to vote! 🏆

:lol: I am way ahead of your thinking here ;)

The new tank is made from a glass window.
The luminaire is as above.
The filter is an MP400 powerhead with an old herb pot with filter foam in it.
The heater is a bunsen burner <-----Just joking. Couldn't really DIY this so I am waiting for a 10W newattino.

Total cost (not including items that I already had or were obsolete from upgrades) = £27

AC
 
This is with the 'lensed' mini luminaire. 3 LEDs
smallfull.jpg


A little bit closer
smallpart.jpg


this is with the unlensed main luminaire lowered so the LEDs are at the same distance from the water. Just the 3 LEDs in this position are being used for this photo so is a reasonable comparison:
largefull.jpg


So you can quite easily see that without lenses the light is spread much better, however with the lenses it pentrates much better as you can see from the substrate in the 2 photos. 1 problem I see is that with lenses the light's 'colour' seems to be altered to slightly yellow!!! Maybe a trick of the eye.

Also to remember that looking at the first photo that is an 18" tall tank. approx 14" from substrate to waterline. The mini luminaire will be on a tank that is 8" tall and approx 6" from substrate to waterline!!! This picture says to me it will be fine:
tinylight.jpg


My conclusions which may be different to others is that on a highlight tank with much more than the 15 LEDs I have then it should be OK but with 15 like mine then the lenses narrow the beam too much!!! The spread is much better for my setup.

Your conclusions may be different.

AC
 
Wow those poor little cory fry are going to be blinded! (If it's the same tank you were scaping to put them in?) Great luminaire though. Really bright and penetrating lights!
 
Great thread, I have been looking for something like this.

Have been trying to decide on a lighting solution for my new tank (36 x 18 x 16), originally I was looking at a marine setup however options are now simpler going down the tropical fish only.
Bought some poor man's LED lighting yesterday, 2 LED pods for £1 (Poundshop). I wasn't expecting anything exciting however I was suprised as they provide a very nice night time / feature lighting, casting a spot light on two pieces of bogwood with the shimmer adding nicely to the overall effect.
Sadly my old ultra compact digital camera was not up to the task of capturing this.

Ideally I would like to have a setup with a bank of 3W White LED providing daytime lighting which would then phase out and be replaced with the night time / feature lighting.
Although for phase 1 i'll settle for just having some LED working :)

Anyway, thanks SuperColey1 you have inspired me to give it a go.
 
Wow those poor little cory fry are going to be blinded! (If it's the same tank you were scaping to put them in?) Great luminaire though. Really bright and penetrating lights!

the good thing about using the variable voltage adaptors is that I can choose how much I power the LEDs at.

So if at 12V it is too bright then I can use it at 9V where the LEDs will be much dimmer ;)

AC
 
My conclusions which may be different to others is that on a highlight tank with much more than the 15 LEDs I have then it should be OK but with 15 like mine then the lenses narrow the beam too much!!! The spread is much better for my setup.

Your conclusions may be different.

AC

If you want to improve the spread slightly, lightly rub the lens with a bit of sand paper. It does decrease the efficiency of the lens a bit as you get some uncontrolled scatter, but you'll get slightly better coverage.

Looks good btw, wish I had more focus to get on with mine, but doing electronics at work all day doesn't make me inspired to do more when I get home in the evening!
 
And this is an individual close up:
completeboardunit.jpg


Got to go...busy, busy, busy :lol:

AC

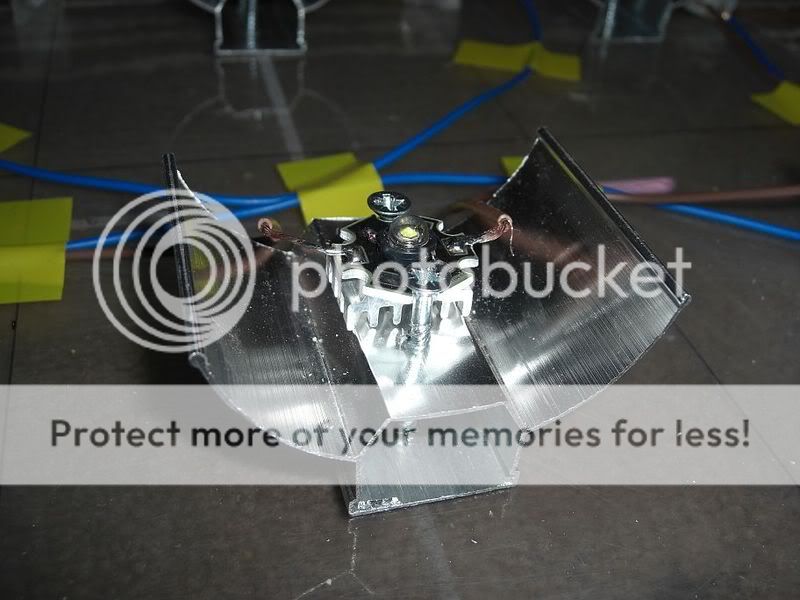
Hi mate looking good so far. Can I make couple of suggestions? I think your heatsinks need a bit more breathing space. What I would try to do is bond the led's straight to the aluminum the heatsink to the other side if necessary. I don't think your heatsink will work efficiently as it is and the aluminum is potentially an adequate heat conductor as is!! Also heat transfer compound isn't an option it is an absolute MUST - I would go further to say that a heatsink can potentially make something hotter if there is air between device and metal (foreign object is enough to create gap!)..

Also regarding your diodes if you really have to use them then get some 1n4001's, and connect them ACROSS the input of your current regulator so that the cathode of the diode is on the + side and Anode is on the negative. Diode is in reverse bias here and will not conduct under normal circumstances. IT IS ABSOLUTELY IMPERATIVE in this situation that you include an in-line fuse between supply and controller of value say 10% higher than maximum rated current. Now the theory...

Normal operation and you get wires hooked up correctly and diode is effectively not there - doesn't conduct and so no wasted energy (in series = volt drop which is hugely wasted!). If you connect leads wrong way round diode conducts, presents maybe 0.6V across driver which *should* be fine but importantly blows the fuse as large current flows. The diode will also die in the process and will now effectively be an internal short so will need to be replaced but at few pence = no probs.

They have been doing it this way to car radios and other electronic equipment for donkeys and so next time your car radio continuously kills fuses after an install you know why :good: And you know repair is pence in fact I have previous cut the diode out and not bothered replacing for my own use lol!
But, tbh you are far better just being real careful and getting into a good habit of using coloured wires and if checking and double checking that way it will make you better at DIY. You can't shunt everything with a diode!

Not sure what else I can add tbh honest the thread went a bit off topic with PIC's another subject entirely but I would highly recommend you get into these little chips they are greeaaat :) (and learn assembler but it is a bit more work!) There isn't anything you CAN@T do on them (nearly) you could have a complete almanac with seasons if you wished controlling temp, lighting and fans from one chip but I guess this doesn't relate to tropical lol!

If you want the diagram I designed a little fan controller that uses a simple opamp and NTC resistor to switch computer fan from slow speed (adjustable) to high speed dependent on temperature. They are all over my house on computer monitor in my PVR lol and I believe these things last as a result. My computer monitor is a big old 22" compaq CRT with fan on the back my mates equivalent Sony which was newer died of heat related illness two years ago!

Hope there was somthing useful their!
 
That is a marked difference in brightness :nod:


However, the first shot had shutter speed of 1/25th and second had shutter speed of 1/10 - that is over 1 stop of light so it is hard to be subjective here. I have no doubt there is a marked difference but the camera has favoured the led tank maybe the metering!
 
Thanks for the advice. I think I'll leave it as it is now though. EVerything working, wiring all sorted and I used brown/blue from the start so is all colour coded. lol

My fans are also on a variable voltage adaptor do I can run them at 3,4.5,6,9 or 12V. I just leave them on 9V so they are quiet whilst creating a draft.

When I said I had use some compound on a couple of the heatsinks I didn't mount the rest without. They all came with thermal pads on the back but I messed a couple up so I stripped it off and used the compound on them.

The small Luminaire I used compound on all of them :)

AC

Ah no probs then mate tbh I haven't read thru everything properly. I might have a deeper read later on :)

I will be watching this thread tho so keep the updates coming :good:
 
That is a marked difference in brightness :nod:


However, the first shot had shutter speed of 1/25th and second had shutter speed of 1/10 - that is over 1 stop of light so it is hard to be subjective here. I have no doubt there is a marked difference but the camera has favoured the led tank maybe the metering!

This is a good point I think (don't realy do photography). ???? 
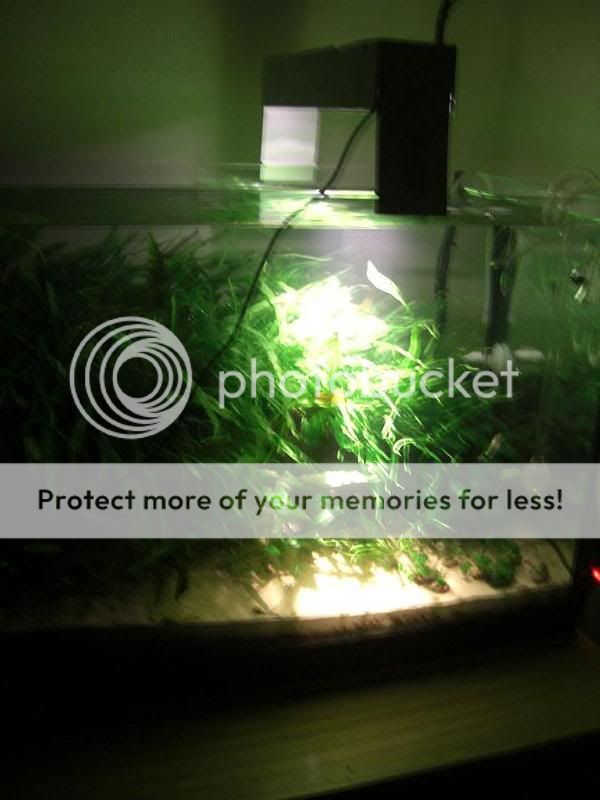
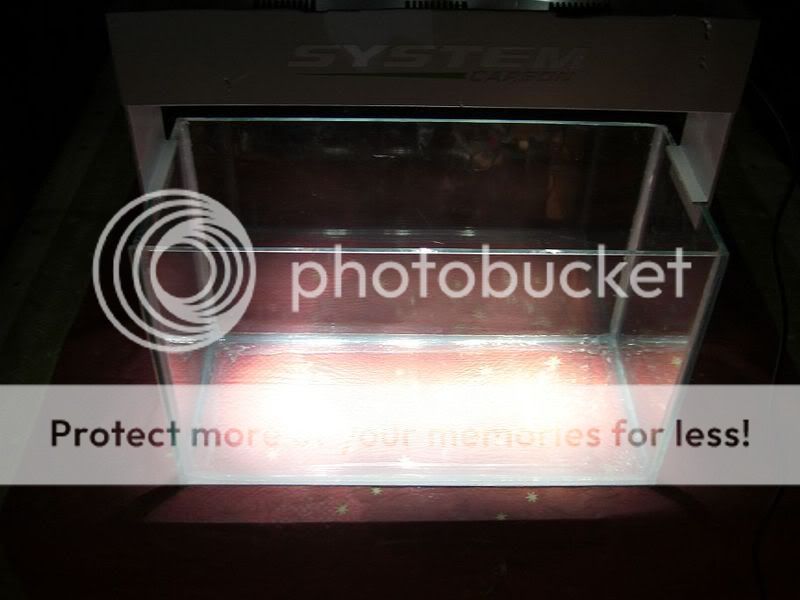
Basically, the shutter of the camera was open longer for the LED's photo, so it let in more light and hence it contributes part-way to the subjective "brightness" increase?

All the best
Rabbut
 
Rabbut. You can see how a camera on auto makes up for the brightness on the photos I did of the board on the floor.

Look at the colour of the flooring with only the houselight on and how the floor and surroundings darken as each series is turned on.

It is brighter than the fluoros though in reality :lol:

AC
 
A few shots of LED heaven for all of the addicts. lol:

This is both tanks. The main tank only has 3 of the 5 series on in this pic so that 2.8W x 9 = 25.2W = 0.76WPG!!! The top one is 3 x 2.8W = 8.4W:

tankcorner.jpg


And a couple of the mini tank. This is the luminaire that has the 30º lenses in. I like the effect they give but may eventually pull the lenses off and get rid of the focus if the plants at the edges don't do well (they aren't planted yet :))
Firstplanted.jpg

front-6.jpg


AC
 
Looks good :good: I presume you will be adding more plants to the nano later, or are you leaving as is?
 

Most reactions

trending

Staff online

Back
Top