Mega-powerful Nitrate And Phosphate Remover Replaces Skimmer, Refugium

The April FOTM Contest Poll is open!
FishForums.net Fish of the Month
🏆 Click to vote! 🏆

i'd love to try one of these, they've been a round years and are tried and tested, but have to agree that i have no way of concealing it

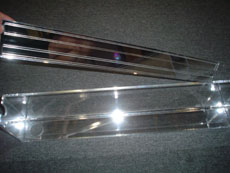
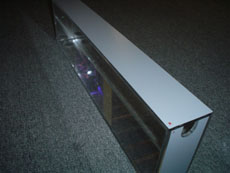
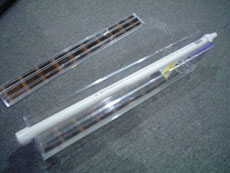
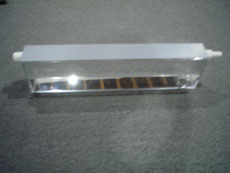
You'll like the acrylic version I'm picking up today. 6" X 6 X 24", no light leakage. I'll be reviewing it soon.


Another Reader Cleans The Green!

Well it's been a good couple of days for clean-tank debuts. Minzuk on the UR site, who came up with the idea of using a gravel vac as a waterfall pipe, just checked in with great results. Here is what he did, along with the dates:

8/14: "I wont be discarding the skimmer or po4 reactor just yet, ill prob still keep them on even after this starts to work. I like new/ressurrected ideas, so though for 5 mins work ill give it a go. Seeding? I cant see anything about seeding in your write up. Rubbing green algae, do you mean the algae that will begin to grow in a few days? Do we let it build up and whilst harvesting it off, try and rub it into the screen?"

8/18: "im on day 6 and this is the result so far [very very light growth in pic]. Is this correct? Am I going on track? its more browny green then green. I can also see small hairy strands of green showing when viewed close up."

8/20: "Im using a 125w envirolite lamp with reflector to light up the area. I suppose I could move it closer down to the screen if needed. Power wise, im using a mj400. Do you think I would get better results with a larger powerhead?"

8/22: "well after moving the light much closer, the screen has started to fill like crazy, its turning into a sludge type algae and behind the brown stuff i can see green algae growing"

9/7: "Its been a few weeks since I made mine. Been busy so not had a chance to update. All I can say is, I was suffering a crap load of hair algae [in the display] and very dusty algea on my rocks, back and sand. Since I have added the screen, the back of the tank has literally cleaned itself bare. the rocks are all very purple again, and a not a cm in sight of any algae. The front glass has not built up any algae for a while. Im due to test tomm for NO3 and PO4 but I can honesly say just by looking at the sparkling water, clean sand and amazing rocks. This thing defo works.....thanks so much!! It has made a major difference to the tank and water quality."
 
Here's the first reader that made use of the sump Version 3. Very neat... no extra space needed. As long as you keep the sump level low enough, you get full use of the screen space:

UserThauro77onSWF-all.jpg
 
You do know there are self cleaning skimmers on the market now, i dont think there are self cleaning turf algae cleaners though... So on a vacation, i think the skimmer could do better, doesnt need as much maintainence.

Hey look, something you should do (which i rarely do, but i'll do it here, i got to start it somewhere), proof :eek:.

http://www.marinedepot.com/ps_ViewItem~cat...ory~FIPSAC.html

Expensive yes, DIYable, yes. Use that, add a tube from your skimmer cup to the drain, heck you may even be able to ignore your skimmer all together... wouldnt that be nice.....
 
This one is a very nice build from someone who knows how to work with acrylic. It's another elevated-screen setup, and the main advantage of his is the 33 watt CFL's on both sides. Lighting will not be a problem here:


UserJohntOnUR-8-all.jpg


By the way, many folks are tie-wrapping thier screens to the pipes. I did not do this, but it could indeed be useful. However it does mean you'll need to take the pipe out with the screen each time.
 
A Fourth User Gets Results!

This is the guy who, when he posted his results on RC, all the clowns started shouting as loud as they could to drown him out. His post came right after I posted the Third User with great results, so the clowns started hitting their post keys in rapid succession (amazing how RC allows personal attacks). His username on RC is Navipro1, and if anyone here has an account there, please invite him to come here for reading and posting, since my RC account is now deleted.

Anyways, his results-post was short and sweet, since he did not tell us ahead of time that he was trying a screen:

"I tried it on 1 of my tanks which always had hair algae problem, I have a refugium for the system but never worked that well, after I implemented this idea, most of my hair algae problem is gone and I can really feed my corals / fish more now and run the lights for a longer photo period, I was sceptical at first but decided to give it a try, I'm glad I did, its now paying off BIG TIME!"
 
The Power Of Light.

Here's an interesting growth sequence. This fellow started out with just a low power NO tube, on one side. After switching to a 23W CFL, things changed:


UserColOnUR-all.jpg
 
It's Time For The Santa Monica 120 Acrylic!

Ok it's time to move my screen from the ugly bucket by the sink (with hoses, wires, timers, etc) to under the tank where it can sit on the sump. The idea for this design came from all the readers who tried to install their screens over their sumps. Low profile is important for me, as it is to anyone without a fish room, so I picked 6" as the max height. That would give me room to lift out the screen and pull it out of the stand, with room to spare. And at 6" height, the pvc pipe will take up 1", leaving 5" for the screen. So the screen will be 5 X 24 = 120 sq in. This is good for a decently-stocked 90 like mine, or a lightly stocked 200 with no real nutrient problems. Here is the initial layout that I gave to the acrylic shop:
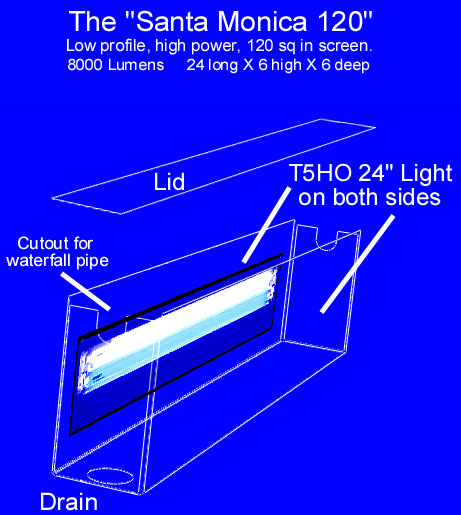
Acrylic.jpg


Wide screens like this are more efficient and powerful (with the same light) than tall narrow screens, but require more flow. My screen will need 24" X 35(gph/in) = 840 gph. However the same 120 sq in screen placed vertically would only need 5" X 35(gph/in) = 175 gph. The vertical placement has a disadvantage in that the water at the top gets filtered by the top of the screen, but then has to travel over the lower parts of the screen. Since it's already been filtered at the top, not much happens on the bottom part of the screen. This problem is eliminated with a horizontal screen since all the water that passes over the 5 inches of screen needs filtering.

Another good use for a low-profile screen like this would be for on-top of tank, when you want the pods to drain directly down into the display. Or, if you don't have a sump, the on-top placement would work great if you put the pump in the display.

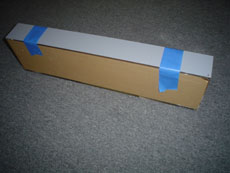
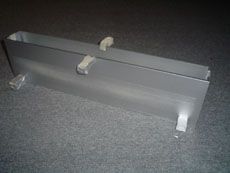
The acrylic box came back from the acrylic shop, finished beautifully. They still have the plans, so if anyone wants the same box, call Hastings Plastics at 310-829-3449 and say you want the "aquarium algae filter screen box". The only change would be the "U" cutouts for the pipe: Tell them to make them a little larger round, and a little deeper, since the pipe was hard to push into them (and it stuck out a bit which made the lid not close all the way. ). I did a little grinding, and now it's perfect. The cost was about $100, without shipping. Here's how is arrived:

AcrylicFromStore.jpg


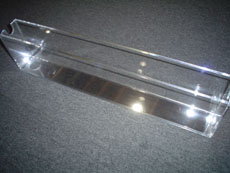
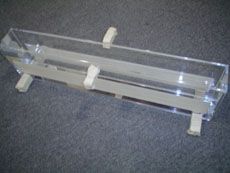
Unwrapped. Notice the bottom and ends are mirrored acrylic, with the mirror facing inwards:

AcrylicUnwrapped.jpg


AcrylicEnd.jpg


AcrylicDrain.jpg


AcrylicLid.jpg


The lid fits mirror-side down:

AcrylicLidOn.jpg


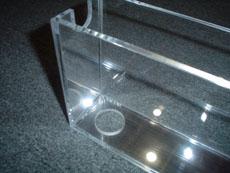
The pipe fits snug so that little light will escape. I had to grind the "U" cutouts a little bigger and deeper so the pipe would not block the lid:

AcrylicPipe.jpg


The lid fit perfectly after the pipe cutouts were enlarged:

AcrylicPipeLid.jpg


Here are the lights. They come with a combo of 10K and actinic:

www.petstore.com/ps_viewItem-idProduct-CU01124-tab-4.html


I removed the bulbs, and got 6500K and 3000K from here:

www.plantlightinghydroponics.com/ge-t5-ho-fluorescent-lamps-c-73_623.html


I'm going to set it up with 6500K on one side and 3000K on the other. Nobody recommednds 10K for macros, except for one person: The guy at Inland Aquatics that has been growing turf screens for 10 years. So, I'll try 10K soon, but not to start. Maybe you can start with 10K on yours and let us know how it works :)

Then I placed the lights on the acrylic and marked off where the the bulbs will be shining through:

AcrylicMarkLightPlacement.jpg


Some method has to be used to mount the lights to the sides. I'm using acrylic blocks and acrylic glue:

AcrylicMounts.jpg


The light-mounting is a bit tricky, because the lights need to be removeable, yet be pressed up against the acrylic to minimize light leakage (which would be important for an above-the-tank placement in plain view). The lights are then placed in the mounts:

AcrylicLights.jpg


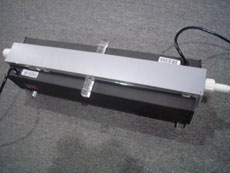
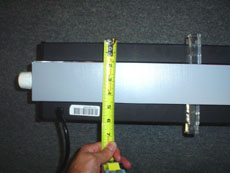
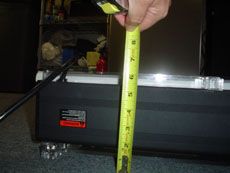
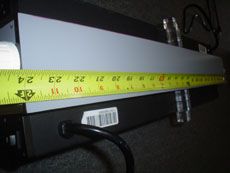
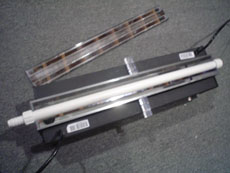
The overall size ended up being 6.5" high X 6" deep X 24" long:

AcrylicDepth.jpg

AcrylicHeight.jpg

AcrylicLength.jpg


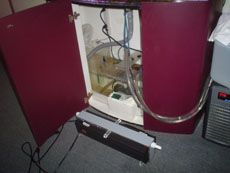
Here's a size comparison; the inside of the stand was once filled with filtration devices, and now it's just water:

AcrylicSize.jpg


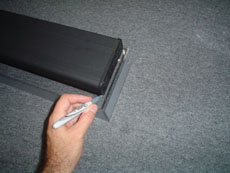
Taped and ready for spray painting:

AcrylicTaped.jpg


First coat was a metallic silver, so that the inside would reflect more:

AcrylicMetalic.jpg


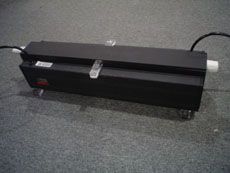
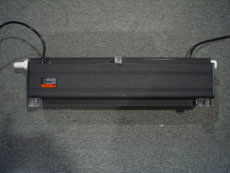
After painting with black primer, and putting lights on:

AcrylicReady.jpg


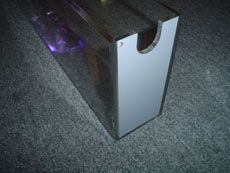
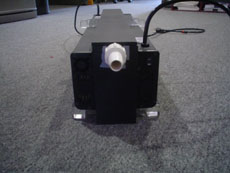
End view:

AcrylicBlackEnd.jpg


Side view:

AcrylicSide.jpg


Lid off, ready to use:

AcrylicReadyLidOpen.jpg


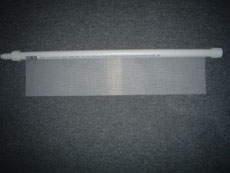
The long, low-profile pipe and screen:

AcrylicPipeScreen.jpg


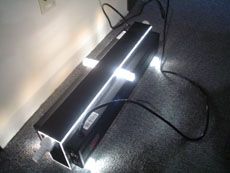
Lights on:

AcrylicReadyLightsOn.jpg


Setting on sump:

AcrylicOnSump.jpg


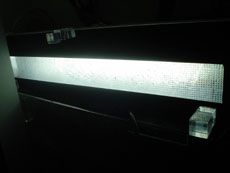
Running, with front light removed to see flow:

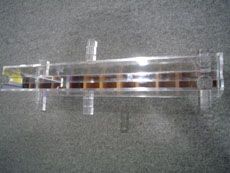
AcrylicSideOpenView.jpg


So, I rubbed algae from my original bucket into the new screen, then installed the screen and turned it on. I'm starting with the flow and lights on 24 hours, in order to speed up the growth. I'll decide later if I'm going to pulse the flow, and I'll wait for the algae to grow a bit before putting the lights on a timer. Also, there is no fan, because I wanted to make it as simple as possible for folks who wanted to try it themselves. I may try a fan later, but for now let's see how it does without one. Also also, I'm leaving my original bucket running, for safety, but of course this will slow down growth on the new screen.
 
Just a thought...

The clear acrilic through which the ligh enters your contraption will grow algea in the humidity won't it? How will you remove this without scratching the acrilic and thus lowering the amount of light entering onto the screen?

If you build a version two, shurely glass would be a better building marterial, as it is more scratch resistant and also heat resistant, so in theory longer lasting? OK more expencive at outley, but I'll recon you'll get that back in savings replacing the acrilic panes/whole box...

Just my thoughts. Looks neat and tidy though...

All the best
Rabbut
 
Well, the bucket version did not grow algae on the walls, because the walls were always dry (even near the screen). So we'll see how it works with the acrylic. It's a test, afterall. Surely there will be more salt collecting than the bucket, but not sure yet about algae. And if it does collect, it's a tradeoff with the lights being so close (and powerful) to the screen. And yes it's more humid since there is no fan, but I may add a fan. Want to see how it works first.

I don't think I'd want to construct with glass. Maybe I'd buy one, but not build one. I don't forsee much scratching, since to get the salt off, you just spray water on it. Not sure how much (if any) algae will develop on the walls though. Heat is not an issue; I put my hand on the inside of the panel, and it's just warm.

Good points.
 
After having run my screen(s) for a while, I'm noticing an interesting situation with the nitrate that might be of interest. This really on applies to other folks once they's already reduce N and P to near zero, but it might good to know for others too.

After getting N and P to zero (Salifert hobby test kits), and keeping everything the same for a few days, I notice that the N start showing again, very very slightly, starting with a barely visible tint (maybe a .1 on the Salifert color scale), then more visible pink (about a .2), and if I leave things alone for a week, it might go all the way to 3. This is happening while P remain zero (absolutely clear on the Salifert phosphate color scale).

Now, I sometimes do over-feeding tests, using massive amounts of stuff that would be considered "pollution" by some folks, and sure enough when I do this I get a small increase in N, but also in P. Then when I go back to normal feeding, the levels go back to zero. But the situation I'm talking about here is not during an over-feeding test. It's just feeding and doing everything else at normally. After about a week the N start a very slight increase, but there is NO increase in P.

So after thinking about what I learned about the relationships between N and P, I remembered that you can sometimes have one of them limiting. I reasoned that P might be limited, and without P the screen can't grow to absorb the N. I wanted to just add P but did not know how, so instead I just fed a bit more. Presto! Zero N again. And again, and again. Every time my normal feeding habbit saw a small rise in N (but not P), it was corrected every time by feeding more! Now that is a nice problem to have. It since has been explained to me why my particular tank might be limiting in P, something to do with my dripping kalk and not using a CO2 reactor. But the solution that was offered was the same: Feed more.

Now of course in order for anyone to get to the point of (possibly) experiencing this situation, you first would have to get your screen to a functioning status, and get your N and P to zero. But it's just one of the smaller points to keep in mind as you fine-tune your setup.
 
A Reader Pulls the Plug!

"Scuba Pro" on the UR site has some good results to tell; here are his complete posts:

9/3: Santamonica after reading through the thread and instructions carefully I am going to give it a try as I like feeding my fish well, means I have bought a skimmer yet I don't like using one due to the food it takes out. I have a couple of questions though: I am going to be doing the sump design version 3. 1) Will the fact that I am not using any timers to create wave affects really affect algae growth that much?? 2) Could I split my display outlet in two and create two of these filters? My sump has four sections! Or would this cause the flow over the sheet to be too slow??

9/9: Well I have set-up the sump version 1 a couple of days ago and its already going very brown. I have decided to actually make either sump version three using a pump or a bucket version on top of my sump, just haven't got the time at the moment. I take it you mean Nitrate and Phosphate readings when referring to N and P?? Also I don't understand why anyone is doubting this. In a natural environment there are no skimmers or mechanical filtration what so ever its all done by nature itself which is basically what we are trying to achieve surely? I can't see there being any drawbacks from trying to put a naturally run filtration system on your tank. I mean Eric Borneman, who in my eyes is one of the best reef keepers and has written books which should be read by anyone looking to succesfully keep a reef aquarium, has a system set-up where by he has a reef tank connected to other tanks where sea grass and other nutrient exporters grow. Now I know this an extreme case but this is ultimately what we are trying to achieve. How people can use their skimmers and UV's and external filters and say that there could be negative effects on your aquarium using a natural fltration method is beyond me. Personally I love the look of this and can totally understand how it works and I have no doubts wether it does or not!!! Just putting my tuppence worth in, not meaning to offend anyone just my opinion.

9/10: Well here are pics of my quick bodge job!! lol. Haven't had time to do it properly. Santamonica can you tell me if it is time to use my fingers under the tap yet?? [pics were not useful]

9/14: Well I have some good news. I decided to turn off my skimmer 4 days ago and took a nitrate reading of 25. I gave the screen half a clean under the tap 3 days ago and now it has gone mental algae blooming. So i decided to take a nitrate reading today before doing a waterchange and they hadn't budged still at 25 maybe even a little lower. This is awsome. I feed very heavily in my tank and I usually have to clean the glass everyday. Since 3 days ago I havent had to touch the front glass with an algae cleaner and the sides the algae is receding. My sand is also not getting any browner either which would definetly happen if the skimmer was off usually. I upgraded my lighting though to a 18w gro light and a 60w reptile light when turning my skimmer off and this has helped greatly. I am also only using about 2/3rds of a 12x12 screen one side!!!!! WOOOHOOO Gonna do a waterchange and keep an eye on the nitrates but I am impressed so far!!
 

Most reactions

trending

Staff online

Back
Top