Newbie - With A Knackered Ballast

MarMar

New Member
Joined
Apr 14, 2014
Messages
4
Reaction score
0
Location
GB
Hi all,
 
I'm new to this forum so i'm just signing in to say hello and to see If anyone can help me please, i will be needing some advice on my knackered Juwel ballast. The tank (a Juwel Delta 100) was given to me by a neighbour just before Christmas 2013 and the lights stopped working a couple of weeks ago. I did the usual and googled for problems with the lights and came to the conclusion that i needed a new ballast.
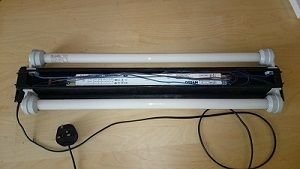
I ordered a new ballast and whilst waiting for it to be delivered i borrowed a Dremel from a friend and opened up the light bar to find a circuit board and two wires from the mains in one end and 3 wires at the other end (cold cathode?) Pics to follow... After reading a thread on here i have found out that i need to add an extra wire to each tube end cap and then connect them to the new ballast. 
 
I would appreciate any advice and assistance.
 
Hope to hear from you all soon
 
Thanks 
 
Mark
 
Welcome to the board.
You could ask a mod to move your thread for you so it can get more attention.
I can't help you i'm afraid.
 
welcomeani.gif
  to TFF, Mark! Hope you enjoy it here.
 
Unfortunately I don't know anything about the light stuff. I'd be too scared to do all that :p
 
Thanks guys
yes.gif

As soon as I've finished this little project (that's taking forever) and the lights are working again ill post some pics of how i did it
photo.gif
 . I'm waiting for the end of the month payday to arrive so i can get a few more bits, then, well lets see how it goes. Wish me luck!
 
Good Luck.
Becareful. 
 
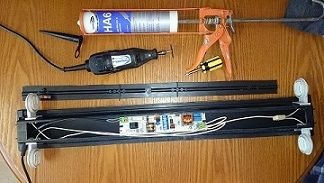
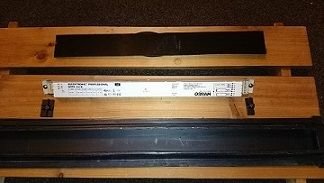
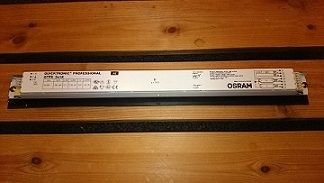
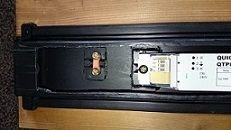
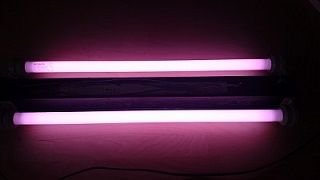
Well i have actually finished rewiring the lights and installing a new ballast. and now after a month or so of using an anglepoise desk lamp for the tank (not very practical) the lights now work WOOHOO. After never taking on such a task i'm quite surprised at how easy it was. After i cut open the light bar i realised  the piece i cut out (pic 1) had the mounts for the ballast and the part to hold the mains wire stable (pic 4) so i cut these off (pic 2) and attached them to the ballast by a couple of small screws(pic 3) then i glued them to a piece of black perspex then waited for the glue to dry then glued the perspex mounted ballast inside the light bar. (pic 4 again) Whilst the glue was drying I started to wire the light end caps. First of all i measured out enough wire to go from inside the end caps to the far end of the ballast, which was just under two feet so i added an extra inch for luck. I then popped the end caps off the light bar from inside by pushing the lugs in till i was able to just push the caps out. Not knowing how to wire the end caps i broke them down to their component parts, not realising that i could have just bared about 1cm of the solid copper core of the wire and just pushed it through the open end of the tube holder making sure that it goes through the copper contact and can't be pulled back out easily so this is what i did with the three other end caps.then i followed the wiring diagram which was printed on the ballast. because i had two wires from each end cap and only 7 terminals on the ballast i had to join two wires together and connect it then doing each end cap in turn until i had them all connected up as it showed on the diagram. I connected the mains wire up last then checked everything was correct I plugged it in and hoped the lights would come on. I took a second or so for the lights to glow but when they did I let out a massive sigh of relief. I left them switched on for a couple of hours to test how hot they'd get and to make sure they didn't just set my light bar on fire. when i was satisfied they were ok i unplugged them and sealed them up with black silicone an a piece of black perspex measured to the dimensions of the bottom of the light bar. I used loads of silicone all around every end cap, all over the outside of the cut out and around the rubber bung where the mains cable enters.
 
1 light unit opened.jpg
 
2 ballast and mounts.jpg
 
3 ballast mounted.jpg
 
4 bits glued in.jpg
 
5 ballast wired up.jpg
 
6 switched on.jpg
 
 
Good job! Sounds too complicated for me :lol: But glad you're happy with it.
 
Thanks for the update.
 
Thanks all,
 
I'm happy it works but the fish are ecstatic now they've got some proper light rays back in their home 
 

Most reactions

Back
Top