
AlexsDaddy
Fishaholic
- Joined
- Jun 13, 2004
- Messages
- 679
- Reaction score
- 1
The Ultimate DIY Tank Divider
I came up with this divider idea when I was getting ready to divide my 6 gal. I was debating on whether I wanted to use Plexiglas or plastic canvas. Then it hit me. Why not use both? Make a frame of Plexiglas with a “window” made from plastic canvas. That’ll give it rigidity plus an area for good water flow through the divider. I added to the dividers a trough along the top of them to reduce the surface movement and filter current, and also for there to be a way that each section would have a constant supply of freshly filtered water. I wanted to share this with all my fellow betta lovers casue we all know that divided tanks mean more bettas, and you need a sturdy divider that won't let them get to each other. Anyway on to the DIY.
What you will need and where to find it:
Plexiglas knife-hardware store (Lowes, Home Depot, etc...)
Steel or aluminum ruler(for cutting straight lines)-same as above
Speed Square(for ensuring your cuts are straight)-same as above
1/16 inch Plexiglas-same as above
Plastic Canvas ( I used 7 count)- Craft section of walmart or any craft specific store.
Aquarium Sealent-Walmart fish isle, Lowes, Local Fish Store
Scissors to cut Plastic Canvas
Dremel rotary tool-not necessary, but nice if you have one.
Drill and a 3/16 or 1/4 inch drill bit
1. First thing is measure your tanks width and height. When measuring the height of the tank, make sure to take into consideration clearance for your filter and heater and whatever else is near the top of the tank. The type of filter that is in the 6 gal that I’m dividing goes along the top back portion of the take as you will see in later pictures. I measured mine so it clears the bottom of the filter output by about 1/4 inch.
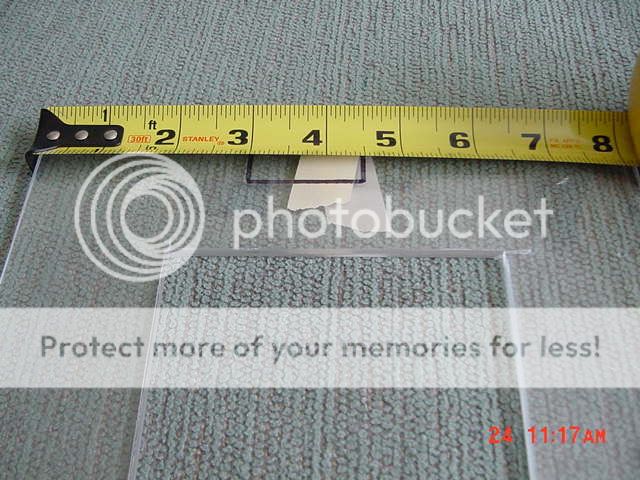
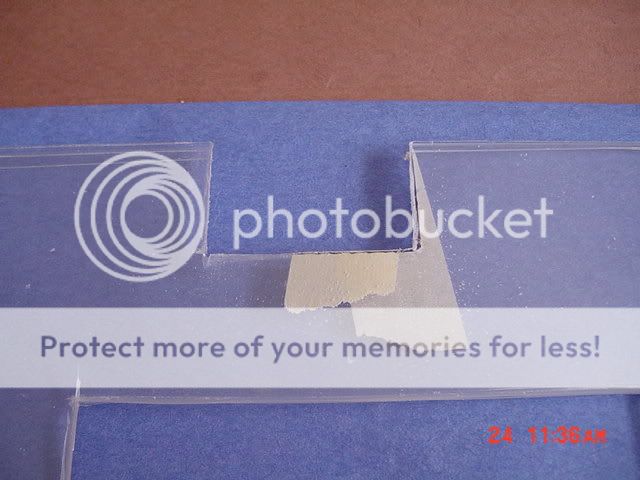
2. After making your measurements and making sure that there will be no clearance issues, cut the Plexiglas to the size you need. You will need 2 pieces per divider so if you are making 2 dividers you will need 4 pieces. After cutting the number of pieces sufficient for the number of dividers you are making measure in 2 inches from each side to make the center cuts of the Plexiglas frame. They will end up looking something like this.

IMPORTANT!! BEFORE GOING ANY FURTHER, TEST FIT YOUR DIVIDER PIECES TO MAKE SURE THEY FIT IN THE TANK!! There would be nothing worse then getting these dividers all the way together only for them not to fit.
3. It was at this point that I made the cuts for the trough at the top of the dividers, but that is pretty much optional so if you want to do it, read on, but if not, skip to step 8.
4. Ok, the purpose of the trough is to reduce the surface movement and filter current from the filter output that our beloved bettas hate. The trough will be positioned directly under the filter output catching the water and running the length of the tank distributing freshly filtered water to each section.
First thing you need to do for the trough is find out where you are going to want it. Measure out from the back of the tank to the outside edge of the filter output.
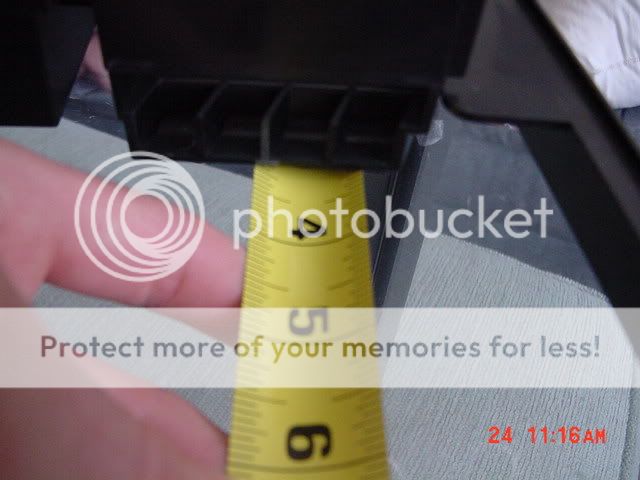
Take whatever that measurement is and take 1/4 inch off it so the edge of the trough will be just under the filter output. My measurement was 3 1/4 inches so I ended up putting my trough at about 3 inches from the back of the tank.
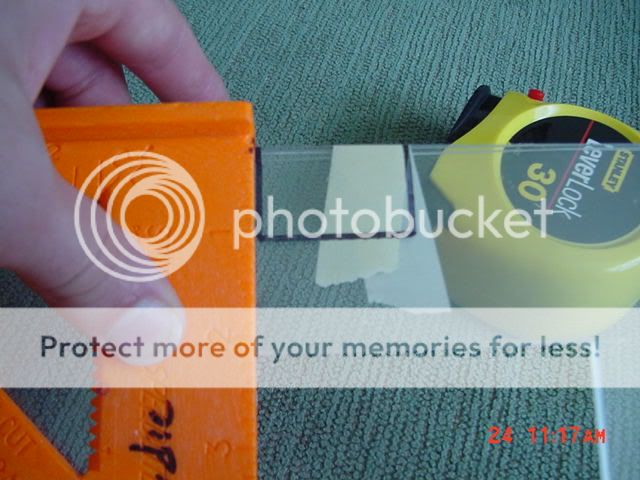
5. The trough will be 1 1/2 inches wide, by 1 inch deep by the length of your tank minus 1 inch. Measure from the back edge of the divider piece the distance of the filter output and mark it with something (sharpie, knife, pen, whatever) then another mark at 1 1/2 inches for the width of the trough.
I used a speed square to measure and mark my lines for the 1 inch of depth.

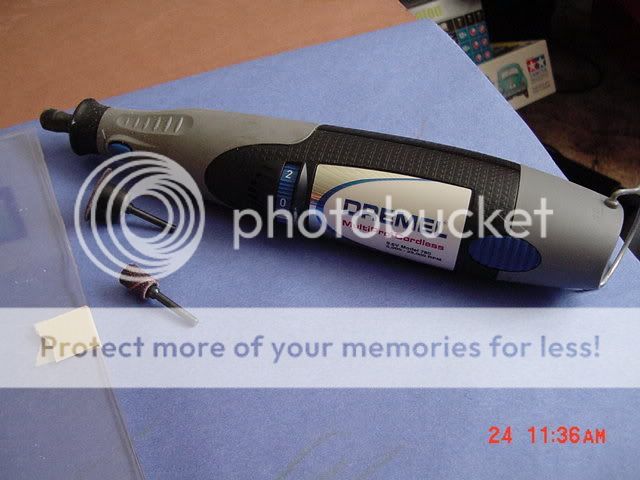
6. Use a dremel or the plexiglas knife to cut this section out. I used a dremel so that way I could tape 2 pieces together and cut 2 at the same time.
7. Now that you have your notch cut in the divider pieces for the trough begin cutting the pieces for the trough. Measure the lenght of your tank, and take 1 inch from that measurement. This will be the overall lenght of the through. For the bottom of the trough cut a piece the length I just mentioned by 1 1/2 inches wide. The sides will be the lenght by 1 inch high, and the ends will be 1 1/2 inches wide by 1 inch high. Test fit the bottom piece with the notch in the divider to make sure it will fit with no issues. Before assembling the trough, drill holes with a 3/16 or 1/4 inch drill bit in the bottom piece. Try to make it so each section of the tank will have an even number of holes. Start off with a small number of holes. After the trough is together you will have to go by trial and error as to how many holes you will need in the bottom of the trough to keep water from overflowing instead of going through the holes in the bottom. Unfortunatly there's no easy way to know how many holes you are going to need. You can assamble the trough now, or set the pieces aside for later assembly. I forgot to take pictures of assembling the trough, Sorry!!!, but the finished product is visible in pictures that will be at the end of this DIY.
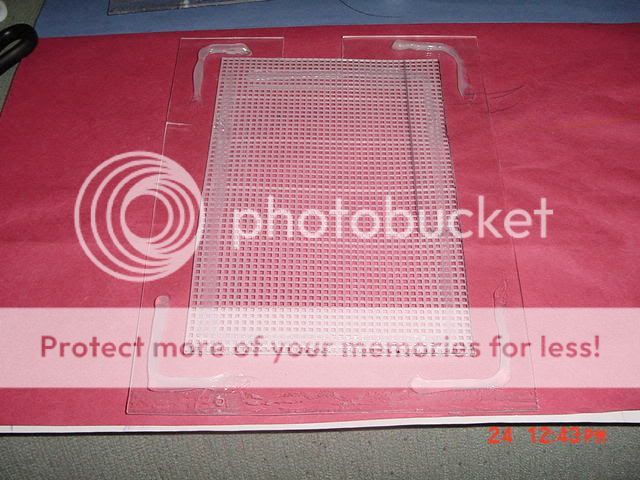
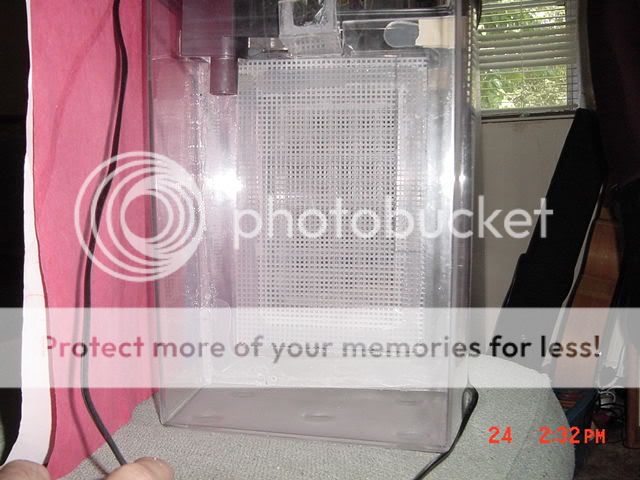
8. Ok, If you haven't already cut the center of the plexiglas frame out, do it now. After cutting out the center of the frame, get out your plastic canvas and position it over the hole so you can get an idea as to how big you want to cut it. I cut mine about 6-8 squares past the edges of the center hole.
9. After cutting the plastic canvas, run a bead of aquarium sealent all the way around the hole about a 1/4 inch away from the edge of the hole,

and position the plastic canvas over the hole as centered as you can get. Do not press it down just yet. Doing that now will just end up with you getting sealent all over your fingers. After positioning the plastic canvas over the hole, run a bead of sealent at each corner of the divider piece. It will look something like this.
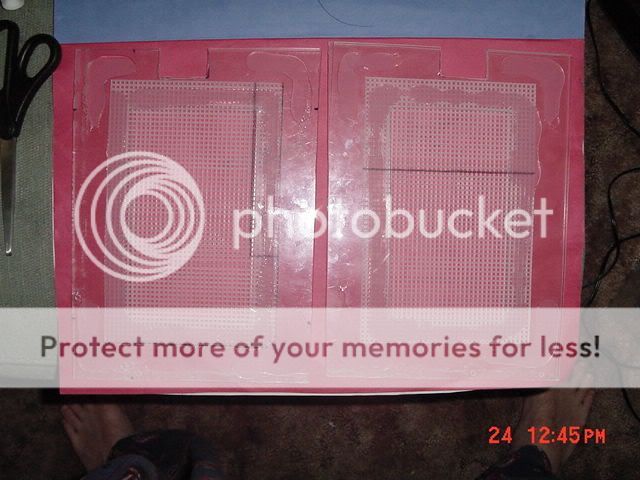
10. Now take the other half of the divider and press it down onto the plastic canvas untill the plexiglas is touching the plastic canvas. As you are pressing it down, sealent will get smushed through the holes and contact the other half of the divider. Press down the corners into the sealent to hold the corners together. Here are my 2 finished dividers.
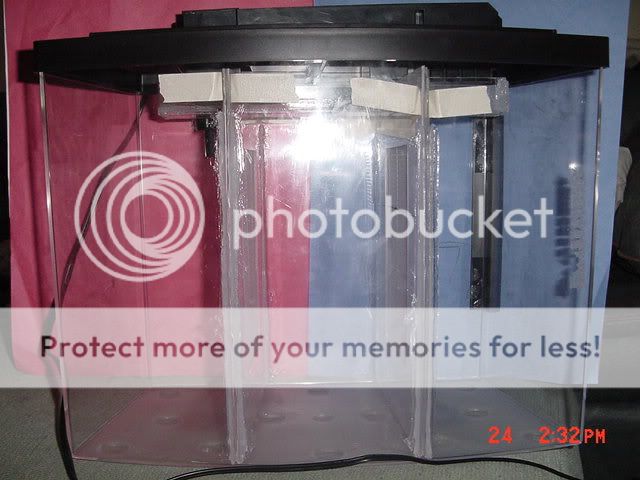
11. Hopefully by now you know how many dividers you are making and where in the tank you are going to put them. After letting the dividers sit to cure for a couple hours you can begin siliconing them into the tank. Hold them in place with masking tape while you silicone them in. If you are putting a trough in it, MAKE SURE THE NOTCHES ARE ALL ON THE CORRECT SIDE OF THE TANK BEFORE SILICONING THEM IN!
12. For those of you who decided to make the trough, let the dividers be for a couple hours to give the silicone a chance to cure some before putting the trough in to see how it looks. That'll keep you from accidently moving the divider and messing up your nice silicone job. Whether you silicone the trough in or not is up to you. I don't intend to so I can remove it for easy cleaning if and when it needs it.
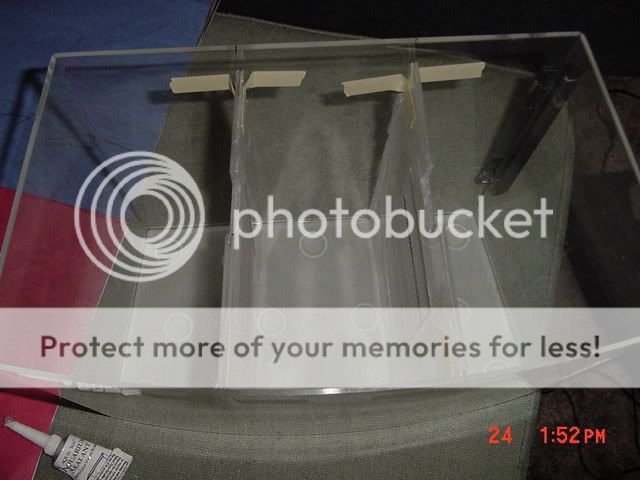
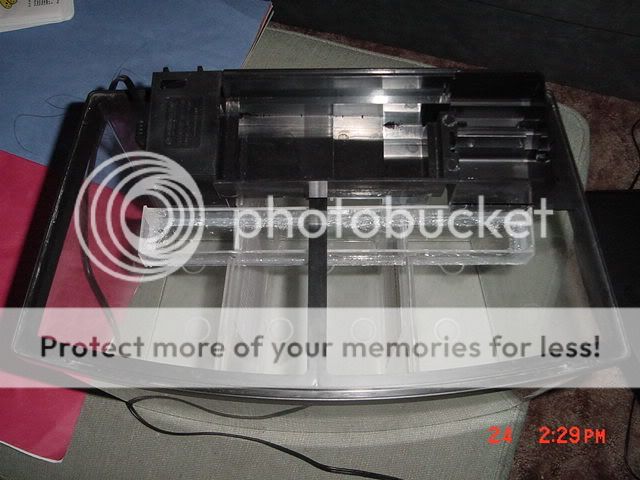
The finished product with trough.
From the sides:
A couple notes about this divider set up:
This can be made as a removable divider instead of permanent. Find some plastic report binders and instead of directly siliconing the dividers in place, silicone the report binders where you want the divider and you will be able to slide the divider in and out for cleaning or re-arranging or whatever.
When you are cutting the plexiglas, BE CAREFUL! Use leather gloves if you have them or if you are just particulary accident prone as a plexiglas knife is sharp and to help prevent blisters from cutting with the plexiglas knife, and if you do any cutting with a dremmel and a cutting wheel, wear safety glasses. I didn't and ended up getting a couple small pieces in my eye. OUCH!
When drilling plexiglas, it is best to have a friend help you. One of you to put a lot of force on the plexiglas and the other one of you to drill it. Always use slow speeds, light pressure, and a sharp drill bit. If not enough force is used to hold down the plexiglas, when the drill bit breaks though, it might catch the plexiglas and pull it up the bit cracking it and forcing you to cut another piece.
Good luck and enjoy!!
I came up with this divider idea when I was getting ready to divide my 6 gal. I was debating on whether I wanted to use Plexiglas or plastic canvas. Then it hit me. Why not use both? Make a frame of Plexiglas with a “window” made from plastic canvas. That’ll give it rigidity plus an area for good water flow through the divider. I added to the dividers a trough along the top of them to reduce the surface movement and filter current, and also for there to be a way that each section would have a constant supply of freshly filtered water. I wanted to share this with all my fellow betta lovers casue we all know that divided tanks mean more bettas, and you need a sturdy divider that won't let them get to each other. Anyway on to the DIY.
What you will need and where to find it:
Plexiglas knife-hardware store (Lowes, Home Depot, etc...)
Steel or aluminum ruler(for cutting straight lines)-same as above
Speed Square(for ensuring your cuts are straight)-same as above
1/16 inch Plexiglas-same as above
Plastic Canvas ( I used 7 count)- Craft section of walmart or any craft specific store.
Aquarium Sealent-Walmart fish isle, Lowes, Local Fish Store
Scissors to cut Plastic Canvas
Dremel rotary tool-not necessary, but nice if you have one.
Drill and a 3/16 or 1/4 inch drill bit
1. First thing is measure your tanks width and height. When measuring the height of the tank, make sure to take into consideration clearance for your filter and heater and whatever else is near the top of the tank. The type of filter that is in the 6 gal that I’m dividing goes along the top back portion of the take as you will see in later pictures. I measured mine so it clears the bottom of the filter output by about 1/4 inch.
2. After making your measurements and making sure that there will be no clearance issues, cut the Plexiglas to the size you need. You will need 2 pieces per divider so if you are making 2 dividers you will need 4 pieces. After cutting the number of pieces sufficient for the number of dividers you are making measure in 2 inches from each side to make the center cuts of the Plexiglas frame. They will end up looking something like this.
IMPORTANT!! BEFORE GOING ANY FURTHER, TEST FIT YOUR DIVIDER PIECES TO MAKE SURE THEY FIT IN THE TANK!! There would be nothing worse then getting these dividers all the way together only for them not to fit.
3. It was at this point that I made the cuts for the trough at the top of the dividers, but that is pretty much optional so if you want to do it, read on, but if not, skip to step 8.
4. Ok, the purpose of the trough is to reduce the surface movement and filter current from the filter output that our beloved bettas hate. The trough will be positioned directly under the filter output catching the water and running the length of the tank distributing freshly filtered water to each section.
First thing you need to do for the trough is find out where you are going to want it. Measure out from the back of the tank to the outside edge of the filter output.
Take whatever that measurement is and take 1/4 inch off it so the edge of the trough will be just under the filter output. My measurement was 3 1/4 inches so I ended up putting my trough at about 3 inches from the back of the tank.
5. The trough will be 1 1/2 inches wide, by 1 inch deep by the length of your tank minus 1 inch. Measure from the back edge of the divider piece the distance of the filter output and mark it with something (sharpie, knife, pen, whatever) then another mark at 1 1/2 inches for the width of the trough.
I used a speed square to measure and mark my lines for the 1 inch of depth.
6. Use a dremel or the plexiglas knife to cut this section out. I used a dremel so that way I could tape 2 pieces together and cut 2 at the same time.
7. Now that you have your notch cut in the divider pieces for the trough begin cutting the pieces for the trough. Measure the lenght of your tank, and take 1 inch from that measurement. This will be the overall lenght of the through. For the bottom of the trough cut a piece the length I just mentioned by 1 1/2 inches wide. The sides will be the lenght by 1 inch high, and the ends will be 1 1/2 inches wide by 1 inch high. Test fit the bottom piece with the notch in the divider to make sure it will fit with no issues. Before assembling the trough, drill holes with a 3/16 or 1/4 inch drill bit in the bottom piece. Try to make it so each section of the tank will have an even number of holes. Start off with a small number of holes. After the trough is together you will have to go by trial and error as to how many holes you will need in the bottom of the trough to keep water from overflowing instead of going through the holes in the bottom. Unfortunatly there's no easy way to know how many holes you are going to need. You can assamble the trough now, or set the pieces aside for later assembly. I forgot to take pictures of assembling the trough, Sorry!!!, but the finished product is visible in pictures that will be at the end of this DIY.
8. Ok, If you haven't already cut the center of the plexiglas frame out, do it now. After cutting out the center of the frame, get out your plastic canvas and position it over the hole so you can get an idea as to how big you want to cut it. I cut mine about 6-8 squares past the edges of the center hole.
9. After cutting the plastic canvas, run a bead of aquarium sealent all the way around the hole about a 1/4 inch away from the edge of the hole,
and position the plastic canvas over the hole as centered as you can get. Do not press it down just yet. Doing that now will just end up with you getting sealent all over your fingers. After positioning the plastic canvas over the hole, run a bead of sealent at each corner of the divider piece. It will look something like this.
10. Now take the other half of the divider and press it down onto the plastic canvas untill the plexiglas is touching the plastic canvas. As you are pressing it down, sealent will get smushed through the holes and contact the other half of the divider. Press down the corners into the sealent to hold the corners together. Here are my 2 finished dividers.
11. Hopefully by now you know how many dividers you are making and where in the tank you are going to put them. After letting the dividers sit to cure for a couple hours you can begin siliconing them into the tank. Hold them in place with masking tape while you silicone them in. If you are putting a trough in it, MAKE SURE THE NOTCHES ARE ALL ON THE CORRECT SIDE OF THE TANK BEFORE SILICONING THEM IN!
12. For those of you who decided to make the trough, let the dividers be for a couple hours to give the silicone a chance to cure some before putting the trough in to see how it looks. That'll keep you from accidently moving the divider and messing up your nice silicone job. Whether you silicone the trough in or not is up to you. I don't intend to so I can remove it for easy cleaning if and when it needs it.
The finished product with trough.
From the sides:
A couple notes about this divider set up:
This can be made as a removable divider instead of permanent. Find some plastic report binders and instead of directly siliconing the dividers in place, silicone the report binders where you want the divider and you will be able to slide the divider in and out for cleaning or re-arranging or whatever.
When you are cutting the plexiglas, BE CAREFUL! Use leather gloves if you have them or if you are just particulary accident prone as a plexiglas knife is sharp and to help prevent blisters from cutting with the plexiglas knife, and if you do any cutting with a dremmel and a cutting wheel, wear safety glasses. I didn't and ended up getting a couple small pieces in my eye. OUCH!
When drilling plexiglas, it is best to have a friend help you. One of you to put a lot of force on the plexiglas and the other one of you to drill it. Always use slow speeds, light pressure, and a sharp drill bit. If not enough force is used to hold down the plexiglas, when the drill bit breaks though, it might catch the plexiglas and pull it up the bit cracking it and forcing you to cut another piece.
Good luck and enjoy!!


 /www.mushi.petfish.net/diydividers.html