Ok,
well I read all these posts on how good pythons were and that they were brill, yada yada yada, and I thought got to get us one of these. So hunting high and low, looking for one, and then discover they are US only and when you can get them over here they are quite expensive.
After reading peoples experiences of them and looking at the website I realised that it shouldn't be that hard to make your own and customise it to your own length.
So, off I trotted to B&Q (although I am sure all reputable, decent DIY shops sell the required merchandise).
I bought
1 Hose (50m, but length to suit)
1 Tap fitting (again to suit, we have a mixer tap in the kitchen, so I got a multi tap connector)
3 standard hose connectors
1 stop end connector
These bad boys are the key - unless they are connected to something they stop the water flow
1 'Y' connector
Ok, the way a python works is by utilising the pressure of the mains water to create a suction force to start the syphoning process - akin to when we suck the water from the tank into a bucket. However, what makes it more than that is that it conviently does this in the place where the water needs to be disposed (sink) and with the added benefit of then easily allowing you to refill!
Pic 1 - this is how it works when you are emptying
Empty
Pic 2 - this is how it works when you are filling.
Fill
Note that the above 2 diagrams, 'Empty' and 'Fill', are the wrong way round in the pinned topic. I have corrected this for this post.
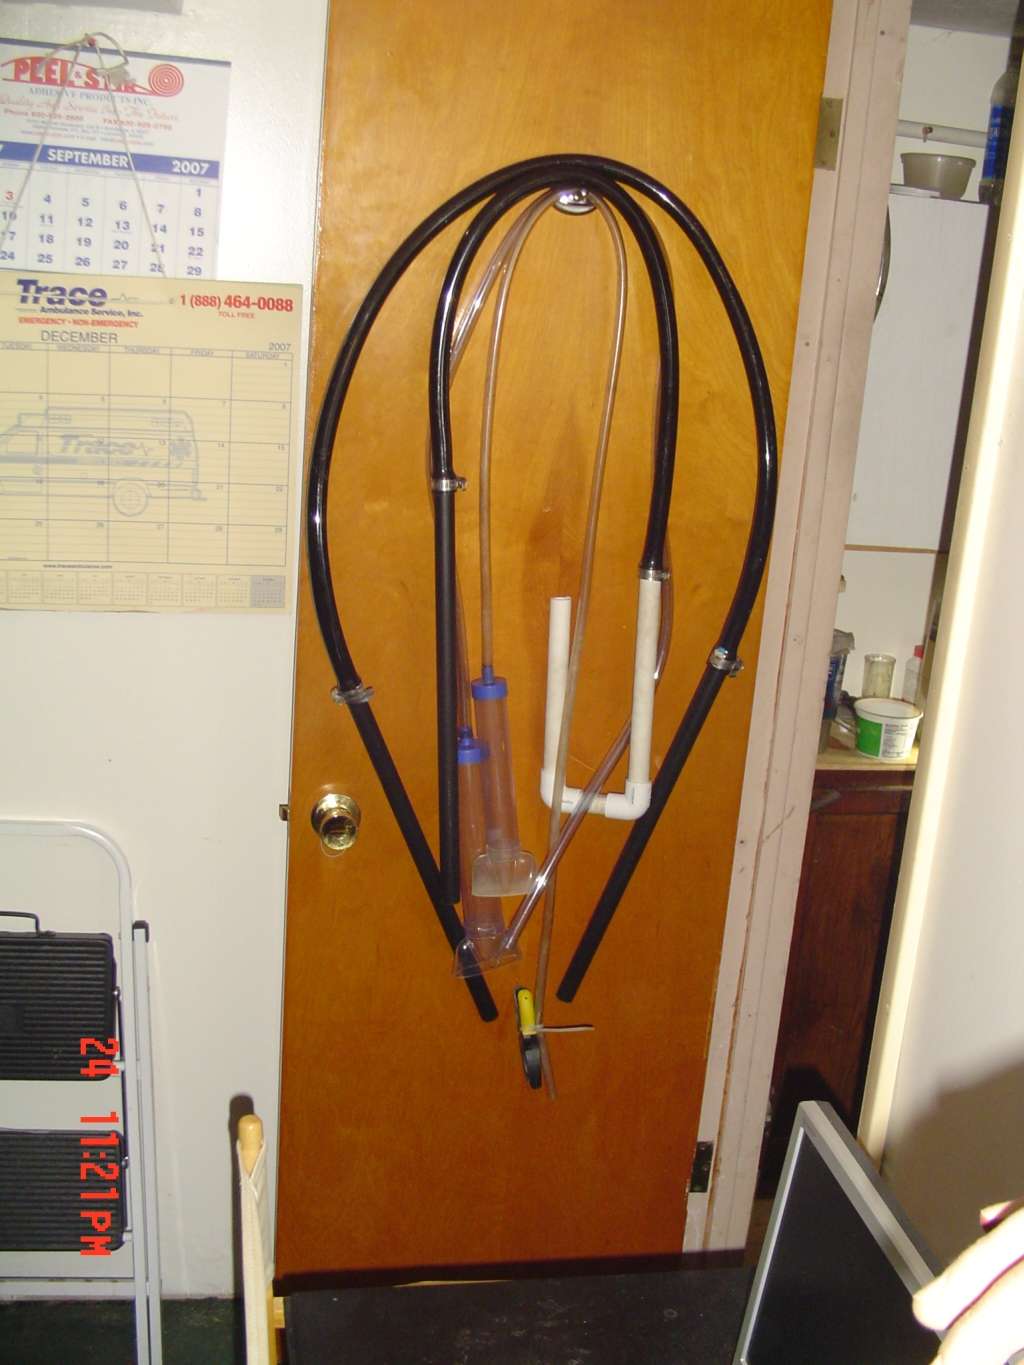
Ok, so how to make,
Have a cup of tea, make some space and get everything together.
This drawing (excuse my basic paint skills

) labels up the parts.
Here
A - hose pipe from spliter to tank,
B - hose pipe from tap to spliter
C - pipe from spliter to sink
D - 'y' shaped connector.
How to make each bit
A - Cut hosepipe to required length (from tank(s) to sink and a bit more - just in case). Can be left longer if will serve more than one tank, but longer the pipe there is a small reduction in effectivenes.
At one end attach normal hose conector and leave other end free (fit gravel filter if attaches for when emptying)
Note that i have attached a standard connector to both ends. I will explain why later.
B - Cut small bit of hose - short enough from tap to sink. On one end attach tap connector, on other end fit standard connector
Note that i needed a standard connector to connect the tap connector to the hose.
C- Cut short bit of hose to sit in sink, on one end attach standard connector, on other end fit stop end connector
D - erm, should be the same.
Admire no doubt brill workmanship.
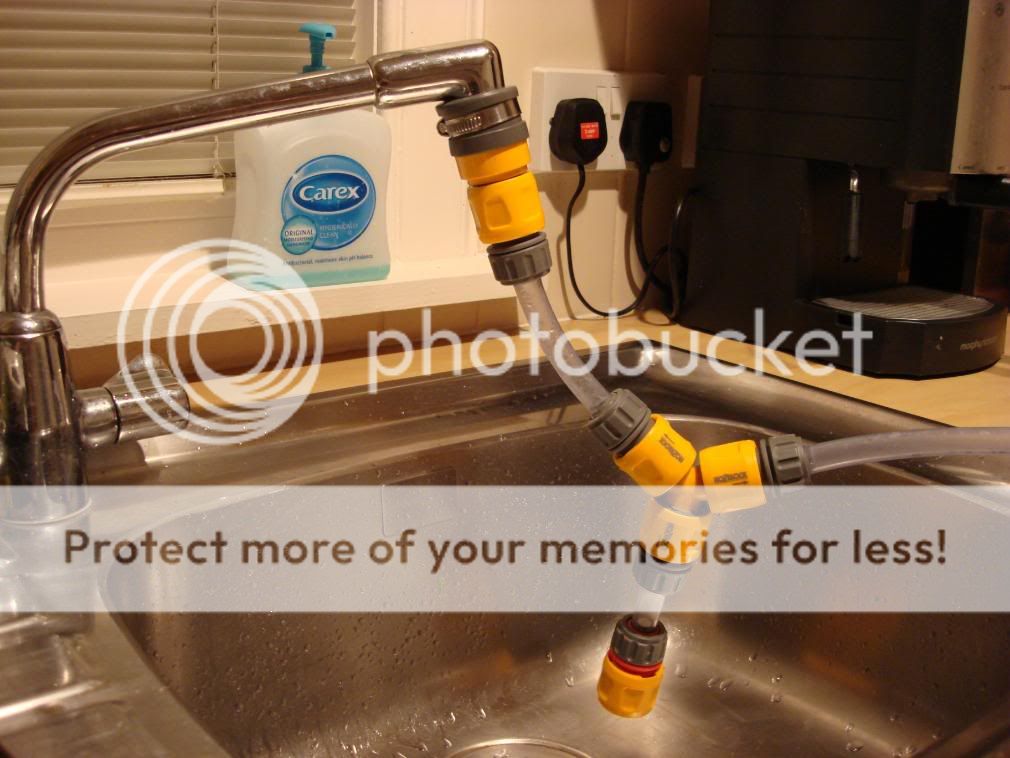
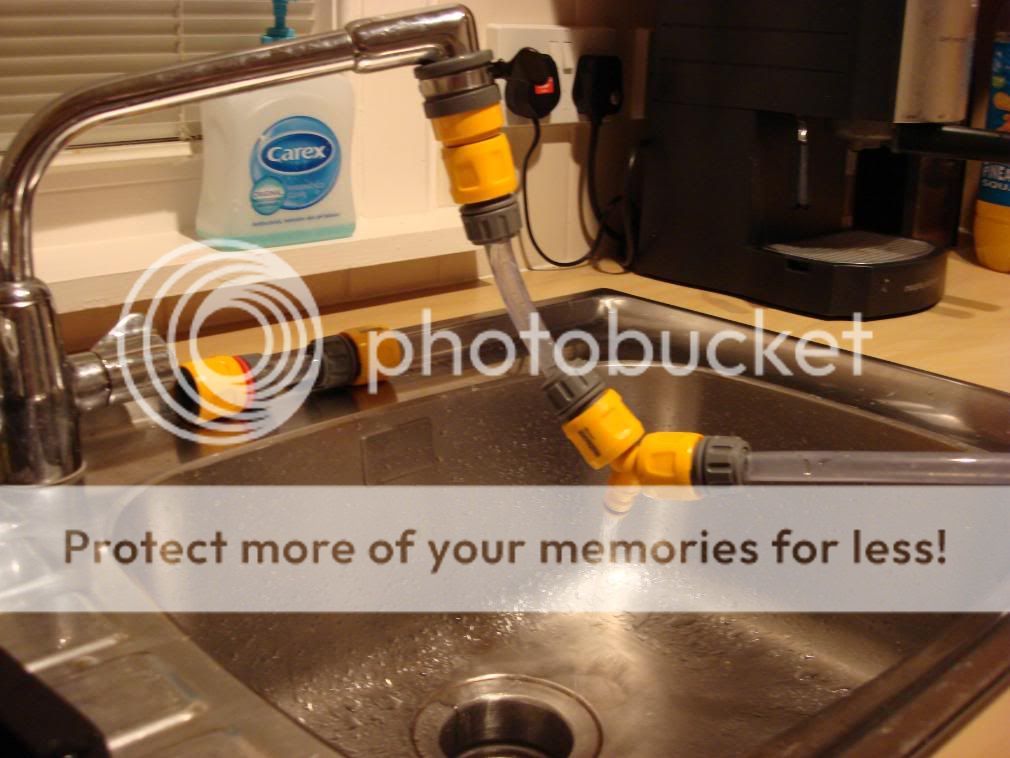
How to assemble
attach all standard end connectors to 'y' connector.
Attach tap connector to tap.
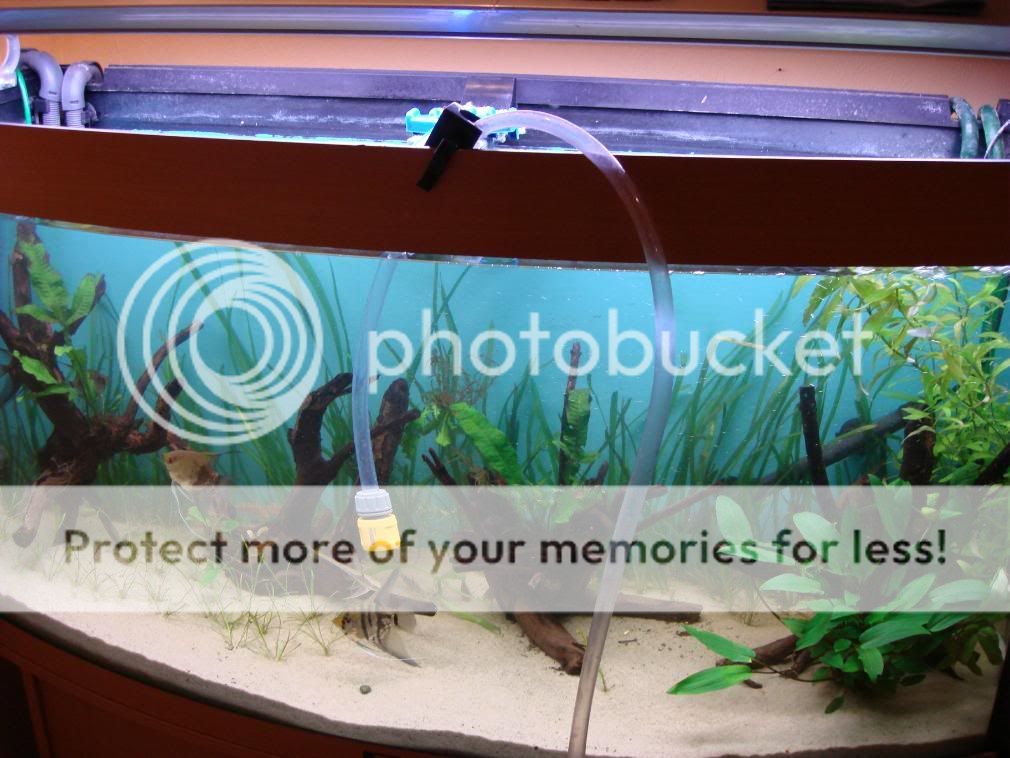
Put bare end in tank.
As above, standard connector will be explained later.
Stop, have cup of tea. (very important that bit).
How to use
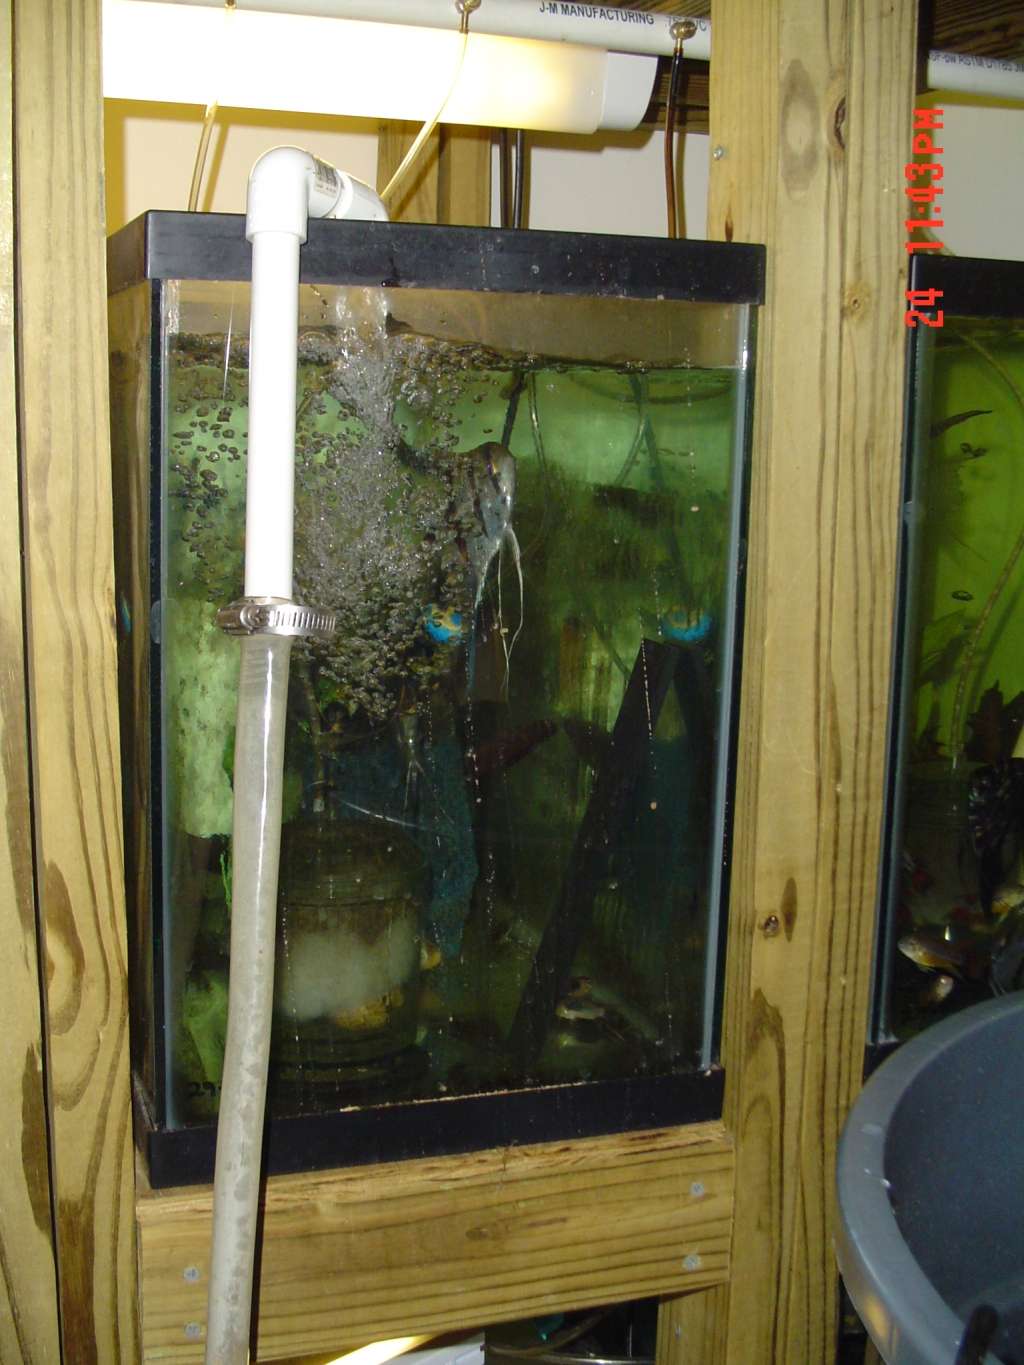
Before you use, do your usual tank maintenance regime, i.e heater, filter, lights off.
Emptying
When emptying do not attach part C to the 'y' shaped connector. Only A and B should be attached and the third 'arm' should be bare - aim it into the sink.
Put the bare end into the tank to be syphoned, fit the gravel vac/filter if you can.
This is why the extra standard connector was fitted to the hose, to attach the gravel cleaner.
Ensure that it won't move for the first bit (you won't be by the tank!).
I personally use the clip supplied with my gravel cleaner. Very handy.
The hardest bit I found was judging what pressure was needed to suck the water up without blowing air down tube A. With a bit of experimentation, and a flooden kitchen later (sorry dear) I found that if you turn the tap on full welly, wait about 5 seconds, then almost off thats all you need to start the process. With a bit of practice I discovered that I could turn the tap off and the water would still come out.
The only prob with this is that the force of the water isn't too great (the higher the tank above the sink the better it will be). This would be more suited to emptying the water or changing it rather thank cleaning the gravel.
Anyway, so long as the bare part of the 'y' connector is aimed at the sink and not the floor, you are cooking with gas.
When done, just take the bare end out of the tank - hold it upright as there will prob still be some water in there.
Filling
When filling, attach part C back to the connector - this is the equivelent of turning the valve or whatever it is on the real Python. However, before you do this, turn on the taps and use the water coming out of the empty 'y' shaped end to get the temp right of the water going into the tank.
Make sure you have your declorinator handy as this will need to go in before or during the water.
Put the bare end of A back in the tank - make sure its secure as the water coming out can make it kick and come out of the tank.
Quickly connect part C -
if you do it smoothly then there should be no need for turning the water supply off. Make sure the normal connector connects to the 'y' otherwise it wont work.
Viola. Assuming you have put the stop end on the right way round the water will have no where to flow other than down the pipe into the tank.
Stop, congratulate yourself and have another cup of tea.
Thats it. Your own personal tank emptying and filling device. While writing this I have realised that this will only really work with mixer taps, if you want warm water going in your tanks.
However, cos you can adjust the rate at which the water goes into the tank, you can maybe let it trickle in and get heated by the heater.
Or, I am sure its possible to use another y connector to mix the water from two taps in part A. Theres another project for another saturday.
Cost wise, I guess it depends what you already have and where you buy things from.
I bought 50m of hose (I will have 2 part a's for different tanks) @ £15
and the fittings were about a tenner in total so it was around £25, not including the afternoon it took me to put it together, test it and so on.
That can easily be cheaper though if you use a smaller hose, or buy cheaper connectors (i got the hozelock ones, but there were B&Q own brands for a little less)
Anyway, I hope this helps some people, I know I will now find it indispensable, cos it means we only need one of us to empty the tank. If anyone has any questions, feel free to put them here or PM me and I'll see what I can do.
Its a shame that real Pythons are so hard to come by here, but its not beyond our skills to improvise and make do with what we can.
Oh, if you hurry out now it can be the perfect Fathers Day Present!!!!
Nick


 /www.fishforums.net/content/Aquarium...769/DIY-Python/
 Thanks again for the thoughts.
 Seriously though, thanks for the info. I am finding it really interesting.